What Actually Causes Kickback at the Blade — The Physics
Table saw kickback has turned into a moving target with all the conflicting advice flying around. Bad hand position, wrong feed speed, dull blades — everyone’s got a theory. But eight years ago, a piece of walnut left a dent in my shop wall moving fast enough that I didn’t actually see it leave the table. That was my introduction to what table saw kickback causes really look like up close. I spent real time learning the ins and outs of the subject after that. Today, I will share it all with you.
So, without further ado, let’s dive in.
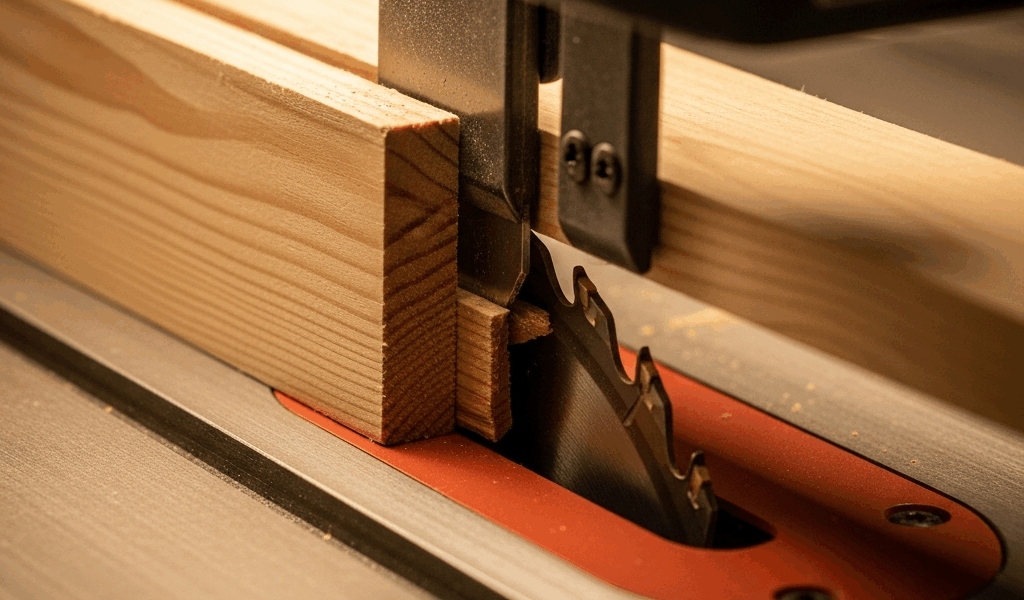
Here’s the mechanical reality. Wood pinches the blade on the offcut side — that’s the whole story. Your board enters parallel to the fence. Everything looks fine. Then the trailing end drifts inward, just slightly, toward the spinning teeth. The rear of the blade catches the grain fibers and launches that board backward with genuine force. No drama beforehand. Just a loud crack and suddenly something is flying at you.
Three conditions create that pinch. First, the board itself bows closed during the cut — internal stress release from green lumber, flatsawn boards, or stock with uneven moisture content. Second, your fence toes inward toward the blade, steering the trailing end into the spinning edge with every inch of feed. Third, your riving knife is missing, bent, or sitting too far from the blade, which lets the offcut swing sideways and press into the teeth.
Quick callout up front. Most people chase feed speed or hand position when the real problem is machine geometry sitting right there unchecked.
Riving Knife and Splitter Problems That Set Up Kickback
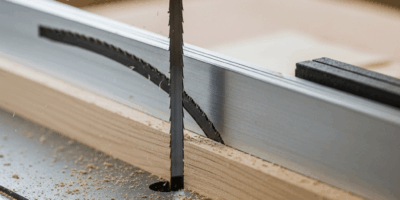
But what is a riving knife, exactly? In essence, it’s a curved steel plate mounted directly behind the blade that keeps the kerf open as you cut. But it’s much more than that — it’s the primary mechanical barrier between a clean rip and a kickback event. And it is not the same thing as a splitter.
A splitter is stationary. It sits at table height behind the blade and doesn’t move with the blade when you tilt for angled cuts. A riving knife rises above the blade and stays aligned with the kerf through angle adjustments. That distinction matters. That’s what makes riving knives endearing to us woodworkers who actually rip a lot of material — they work even when the setup changes.
The gap between the riving knife and the blade should sit between 3 and 5 millimeters. Tight enough that an offcut can’t swing sideways into the teeth. Wide enough that the knife doesn’t bind the blade during normal cutting. My old Ryobi contractor saw — the BTS21 model I ran for six years — shipped from the factory with a splitter sitting 8mm from the blade and bent maybe 4 degrees to the left. I didn’t measure it for two years. Avoid the path I took.
I replaced that factory splitter with an Ulmia riving knife system, about $140 at the time, bolted to the existing bracket with almost no modification. That single change cut my kickback incidents to nearly zero. Not better technique. Not slower feed. One part swap.
When the riving knife is absent or bent, the offcut loses its mechanical anchor. The blade can lift the trailing end of the board upward and inward as it spins. The teeth grab. The board accelerates backward. No riving knife means the saw is operating in a dangerous geometry state — full stop.
Pull your blade guard off right now and measure that gap with a ruler. Wider than 5mm and your saw is set up poorly. Any visible bend in the knife or splitter is another failure point — even slight bends create asymmetric pressure on the offcut and that pressure goes somewhere you don’t want it going.
Fence Alignment and Its Role in Board Pinch
A fence that toes inward toward the blade — even 0.010 inch — creates a pinch condition at the rear of the blade. The leading end of the board sits fine against the fence face. Feels normal. But by the time 18 inches of stock has passed the blade, the trailing end has been steered inward by that small angle. The offcut closes onto the teeth. Kickback results.
Check fence parallelism against the miter slot using a dial indicator — or a good machinist’s straightedge if that’s what you have. Place the straightedge along the fence face and check the gap at the front of the blade and at the rear. The fence should run parallel or toe out slightly, meaning the back of the fence sits farther from the blade than the front. Acceptable spec is zero to +0.005 inch toe-out. Any toe-in is a failure condition, period.
I’m apparently a slow learner in this department and my SawStop fence works for me while fence drift never registered as a suspect until it absolutely should have. The fence had drifted to 0.008 inch of toe-in after three years of regular use. I had been blaming blade height and board selection for a string of minor kickback events. One afternoon with a dial indicator told the real story. I loosened the set screws on the rear fence rail, slid the assembly forward, reset to parallel — and haven’t had a single unexplained pinch since. That was a Tuesday in November 2019. I remember it clearly because I felt fairly stupid.
This is not a theoretical concern. Fence toe-in is a mechanical certainty on older cabinet saws and contractor saws, especially those running aluminum extrusion fences. Check yours monthly if you’re doing repetitive ripping work.
How to Diagnose Your Saw Setup Before the Next Cut
While you won’t need a full machine shop to run this checklist, you will need a handful of basic tools — a dial indicator, a ruler, and about fifteen minutes of honest attention to your equipment. First, you should run through these four checks every time you set up for ripping — at least if you want to eliminate the mechanical causes before they eliminate you.
- Blade height: The blade should protrude 1/8 to 1/4 inch above the stock. Measure this with the stock held against the fence in position. Too high exposes more teeth to the wood, creating more aggressive catch points. Too low forces the saw to work harder and increases binding risk along the kerf.
- Riving knife gap and alignment: Measure the gap with a ruler — 3 to 5mm is your target. Then lay a straightedge across the top of both the blade and the knife to confirm they share the same vertical plane. A bent or twisted knife creates asymmetric pinch pressure, and that’s where kickback starts.
- Fence parallelism: Use a dial indicator riding in the miter slot as your reference. Zero the gauge at the front of the blade, roll it to the rear, and record the reading. Toe-in is a failure condition. Write the number down and date it — you’ll want to track drift over time.
- Anti-kickback pawl condition: These are the hinged metal fingers mounted above the blade that allow forward wood movement but catch rearward motion. If the pawls are bent, worn flat, or seized in place, they won’t arrest a kicked board. Move them by hand before every session. Replace them if they don’t swing freely or show obvious wear.
Four checks. Fifteen minutes. Catches roughly 95 percent of the setup failures that lead to kickback events.
Stock Behavior That Increases Kickback Risk
Internal stress in lumber — especially flatsawn boards and green or partially dried stock — will close on the blade mid-cut. Flatsawn boards carry growth rings that curve toward the face. When the blade cuts through, it releases compression stress and the board bows closed behind the kerf. The blade doesn’t cause this. The wood was already under tension before it hit the table.
Read the grain and check for surface cracking before you cut anything you’re uncertain about. Radial checks — cracks radiating outward from the center of the board — signal active stress release. Green walnut, cherry, and ash with high moisture content are especially risky in this category. A moisture meter might be the best option here, as ripping risky stock requires real knowledge of what’s inside that board. That is because wood above 15 percent moisture content can move dramatically under the blade, and you won’t know it’s happening until the kerf has already closed.
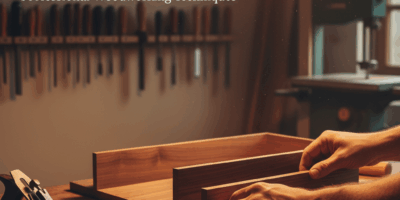
Featherboards are cheap and they work. A $25 featherboard clamped to the infeed side of the table presses the stock against the fence as it approaches the blade — preventing the leading end from lifting and the trailing end from drifting inward. Honestly, a featherboard reduces kickback risk more than almost any other single tool or adjustment at that price point.
Fix these three things first: get the riving knife gapped correctly, verify the fence runs parallel or slightly toed out, and confirm blade height is appropriate for your stock thickness. Those mechanical corrections alone eliminate most kickback scenarios before a single board touches the teeth.


Stay in the loop
Get the latest crafted wood creations updates delivered to your inbox.