“`html
How to Know When Your Plane Iron Actually Needs Sharpening
I’ve been running a small woodworking shop for twelve years now, and I learned early on that waiting until a plane iron feels completely dull is the wrong move. The trick is catching the moment it transitions from “still working fine” to “stealing my time” before you’re fighting with the iron.
The thumbnail test is the first signal. I run my thumb perpendicular across the iron edge—never along it, obviously. A sharp edge will catch on skin. The moment it starts gliding without resistance, that’s when I know I’m headed toward resharpening within the next few hours of work. Most woodworkers wait too long past this point.
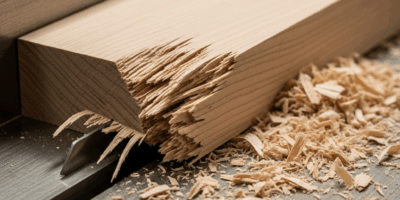
Wood tear-out patterns never lie. When your smoothing plane starts creating little splinters on the exit grain instead of leaving a glassy surface, the iron’s already lost the battle. I used to push through this thinking I could compensate with technique. I couldn’t. Figured maple and spalted wood especially demand an edge that’s legitimately sharp—not “good enough” sharp.
There’s also the resistance feel. A dull plane requires noticeably more push pressure. Your shoulders notice it before your brain does. If you’re muscling the plane more than usual, stop and test the iron. I’ve found most woodworkers add 40 percent more effort before finally admitting something’s wrong.
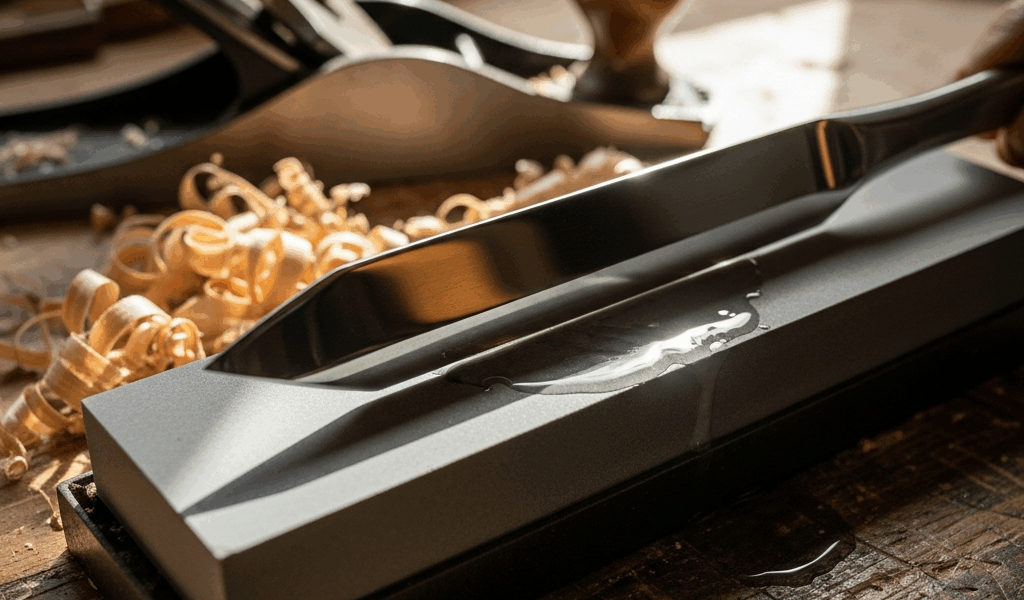
Probably should have opened with this section, honestly—visual inspection matters. Hold the iron to light at an angle. A sharp edge disappears. A dull edge shows a glinting line. That line gets thicker as the edge degrades. Once you see it clearly, stropping won’t save you; you need actual sharpening.
Sharpening Frequency by Plane Type and Wood Species
Frequency depends entirely on what you’re actually doing. A jointer plane and a smoothing plane have completely different wear patterns, and wood species change everything too.
Jointer Planes
These take the abuse. A 24-inch jointer plane straightening hardwood gets roughly 20 to 30 linear feet of work before the iron starts losing sharpness noticeably. In my shop, that’s usually 3 to 4 boards of 8/4 walnut or hard maple before I’m stropping. For softwood like pine or spruce, you can push it to 40 feet. But hardwood with reversing grain? I resharpen after every other session.
A full resharpening of a jointer iron takes me about 45 minutes from stone to final stropping if I’m not doing any major flattening work. That’s the time investment you’re looking at when dullness creeps in.
Smoothing Planes
Smoother irons need more frequent attention, oddly enough. Because you’re trying to create a finish surface, even slight dullness becomes visible. I sharpen my smoothing plane iron every 8 to 12 board-feet on figured wood, every 20 to 30 board-feet on straight-grain stock. The difference between a 5-micron edge and a 1-micron edge shows up immediately in the surface quality.
I learned this the hard way pushing a dull smoother on curly cherry. The iron tore grain I could have easily avoided with a sharper edge. Now I check the smoothing plane daily, even if I’m only working a few hours.
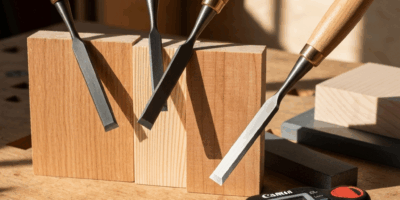
Jack Planes and Roughing
These are different animals entirely. A cambered jack plane iron with a 45-degree bevel dulls faster because you’re removing more wood volume. Expect resharpening every 40 to 60 linear feet of work, more frequently on figured or reversing-grain material. The camber creates its own pressure point, so the edge wears unevenly.
Wood Species Impact
Figured wood and reversing grain absolutely crush edge life. Curly maple, spalted wood, and highly figured walnut can reduce sharpening intervals by 50 percent compared to straight-grain stock. The crystal structure in these woods is chaotic—your iron’s hitting grain at wild angles constantly.
Softwoods preserve the edge longer in terms of sharpness, but hardwoods show dullness sooner because the contrast between sharp and dull is more obvious. You might get more actual feet-per-sharpen from pine, but you’ll notice the edge is gone faster on walnut.
Maintenance Sharpening vs Full Restoration
This is where most shop owners lose time. There’s a massive difference between stropping to extend edge life and doing a full resharpening, and knowing which approach to use matters for your schedule.
Stropping on leather with stropping compound—I use Chromium Oxide on a standard leather strop—extends a good edge by about 20 to 30 percent. If your iron still passes the thumbnail test but you’re seeing minor resistance creep, stropping buys you another few hours. Takes 90 seconds. It’s pure efficiency.
Once the iron fails the thumbnail test completely, stropping is theater. You need stones. A maintenance sharpening—just the leather strop area, maybe a quick pass on your finest stone, usually a 10,000-grit ceramic—takes 10 to 15 minutes and resets the edge for another full session. I do this maybe twice a week depending on my current projects.
Full restoration happens when you’ve let things slide too long or when the bevel gets rounded from repeated light honing. This is 45 minutes to an hour starting from a coarser grit stone and working through the full progression. It’s necessary, but it’s also the cost of ignoring earlier signals.
The math matters. Spending two minutes stropping every two hours beats spending 45 minutes resharpening every week. Prevention is faster than restoration by a factor of three or four in my experience.
When to Replace the Iron Instead of Resharpening
Not every iron is worth keeping. I made this mistake for years before I built the calculation into my shop routine.
A quality iron like a Holtey or a vintage Stanley from the pre-1920s is absolutely worth resharpening repeatedly. The steel holds an edge better, and the bevel geometry accepts resharpening without dimensional loss. I’ve resharpened some vintage jointer irons 30 times over. They’re still serviceable.
Economy irons—the ones that came in $35 plane sets—are different. After 4 to 5 full resharpenings, the bevel angle starts shifting, the edge struggles to hold focus, and you’re spending more time honing than you would have spent buying a replacement iron for $25 to $40.
Pitting from rust or oxidation is the point of no return. If the iron has pits deeper than 1/32 inch, resharpening might remove them, but you’re also removing valuable material height. Once you’ve ground down an inch or more of overall thickness, replacement makes sense. Most quality irons can handle resharpening down to about 1/4 inch thick before they lose functional mass.
Repeated chipping along the edge is another signal. If you’re seeing the same stress points chip after every sharpening, the steel composition is failing. This usually happens with very brittle irons or ones that have been heat-treated poorly.
The decision comes down to this: if the iron cost less than 30 minutes of your labor rate, replace it. If it cost more—or if it’s a tool you specifically chose and value—resharpen it. In my shop running an $85/hour effective rate, that breakpoint is around $40 for the iron.
Storage and Protection Between Sharpening Sessions
How you store irons directly affects sharpening frequency. A plane iron sitting in a humid shop losing sharpness to oxidation every other day is costing you money.
I use cork guards—just thick cork sheets with slots cut for the iron—stacked with the plane on a wooden shelf away from direct moisture sources. The cork protects the edge from dulling through incidental contact while preventing the edge from pressing into something and microchipping. Cost is about $12 for cork sheets that last years.
Magnetic strips are another option, but I’ve found they can misalign the iron slightly over time. Cork guards keep everything neutral.
Storage location matters. A plane iron sitting near a window in a damp climate will oxidize faster than one in a dry area. Oxidation doesn’t directly dull the edge, but rust pitting does. I keep my sharpening station and plane storage in the driest corner of the shop, away from humidity zones.
Wood guards—simple wooden sleeves that slide over the iron—work too. I use them on my smoothing planes specifically because these irons live through the most abusive storage scenarios. A $3 wooden guard prevents $8 worth of edge restoration.
The real maintenance edge comes from consistency. Irons stored dry and protected need resharpening roughly 30 to 40 percent less frequently than irons stored casually. Over a year, that’s easily 8 to 10 fewer sharpening sessions, which is nearly 8 hours of shop time reclaimed.
“`

Stay in the loop
Get the latest crafted wood creations updates delivered to your inbox.