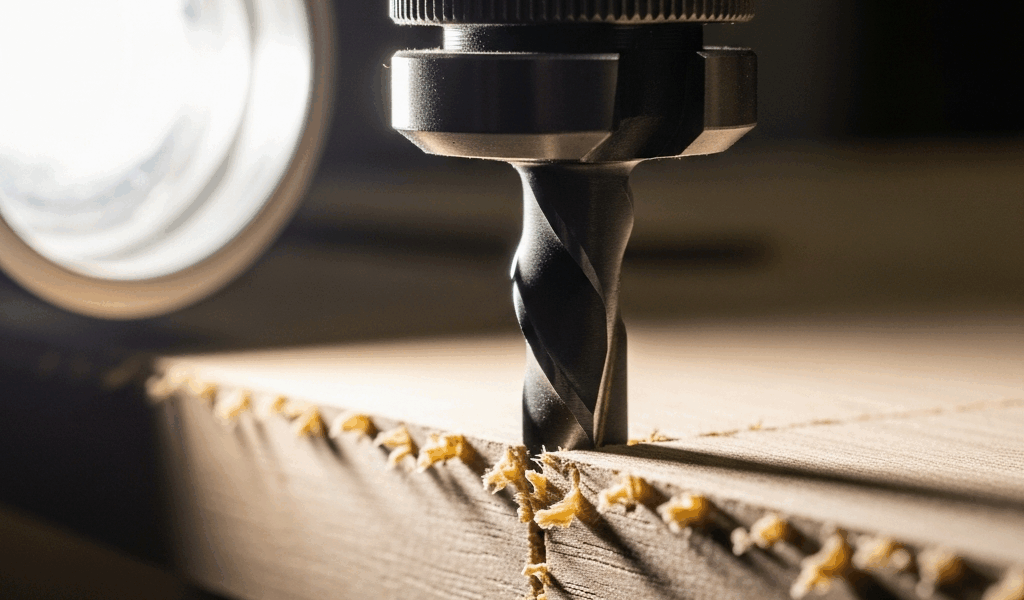
Why Tearout Happens When Bits Feel Sharp
Router bit deflection under load causes tearout—and I’ve watched experienced woodworkers spend an hour re-sharpening a perfectly good bit when the real culprit was half a millimeter of spindle runout. This happened to me about three years ago when I was running production cuts on a five-piece frame set. The bit looked pristine. Sharp enough to shave arm hair. Yet every exit cut on curly maple was leaving a fuzzy, torn edge that needed scraping.
I assumed the maple grain was fighting me. Grabbed another bit. Same problem. That’s when I realized—it wasn’t the bit.
Here’s what actually happens: When a router bit wobbles as it rotates, the cutting edges don’t follow the same circular path twice. One revolution, the flute is 0.003 inches deeper than the last. The bit flexes under load. The spindle bearings shift slightly. The collet isn’t seating flush against the bit shank. Wood fibers get compressed rather than cleanly severed. Tearout spreads like splintering ice.
This is different from bit dullness. A dull bit generates heat and requires excessive feed pressure, but it still follows a consistent circular path. A deflecting bit? It’s making a wavy, slightly enlarged bore every single pass. The exit side suffers worst because the deflection compounds as the bit approaches the back surface.
Three categories cause this. First: collet wear. A collet that’s been clamped and unclamped hundreds of times loses its grip. The spring fingers fatigue. They no longer squeeze with uniform force around the bit shank. Second: spindle bearing play. The main spindle shaft has tiny radial clearances — usually 0.0005 to 0.001 inches on decent machines. Years of aggressive plunge cuts and side loads wear those bearings down. Third: installation error. I’ve seen bits seated 1/16 inch too shallow in the collet because someone didn’t push hard enough while tightening. That’s more common than people admit.
Check Collet Runout in 5 Minutes Without Removing Router
You don’t need to tear down the router to diagnose this. A dial indicator mounted to the router base costs $25 to $40 and takes five minutes to use.
Here’s the procedure I use: Mount a 1/4-inch straight bit in the collet using your normal routine — no shortcuts, tighten firmly. Leave the router on the workbench unplugged. Slide the dial indicator stem against the bit’s side, about 1/2 inch below the collet. Spin the bit by hand one full rotation while watching the gauge needle. The total needle movement is your runout.
Acceptable runout on a trim router or standard fixed-base unit? 0.005 inches or less. Fancy CNC machines might run 0.002 inches. Your typical workshop router hits the threshold where tearout becomes visible on figured grain right around 0.005 inches — especially on the exit side of plunge cuts.
If the needle swings 0.010 inches or more, collet wear is almost certainly the culprit. Replacement collets run $12 to $45 depending on the router brand. DeWalt 618 collets are $18. Bosch 1600 series, around $22. Buy the correct size for your bit diameter — 1/4 inch, 1/2 inch, or whatever you’re running.
Probably should have opened with this section, honestly. It saves so much guesswork. I had a client mention casement window tearout on their CNC and I walked them through this in five minutes over the phone. They ordered a replacement collet, installed it, and sent a photo of a perfectly clean cut.
The procedure also works with feeler gauges if you don’t have an indicator. Spin the bit and slide progressively thicker gauges between the bit and a fixed point. When you find the thickness that just touches on one side of the rotation and gaps on the other, that’s approximately your runout. Less precise, but it works in the field.
Bit Installation Error That Builders Miss
This is where I’ve made the most mistakes, and I see experienced builders do it constantly. The collet pulls tighter as the bit sits deeper into the socket. Most people do this: Insert the bit, tighten the collet nut with a standard router wrench, and call it done.
Here’s what’s actually happening: If the bit shank doesn’t bottom against the collet’s inner shoulder, you’ve got a gap. The collet fingers are gripping the shank higher up — not at the engineered seating surface. One thirty-second of an inch of shallow seating creates measurable deflection. Spin that bit at 24,000 rpm and the wobble becomes destructive.
The correct procedure takes fifteen extra seconds. Push the bit in firmly using your palm against the shank, pressing up into the collet with gentle pressure. Hold it there. Tighten the nut hand-tight first with no wrench. Then use a wrench for a final firm quarter turn. Not aggressive. Firm. The bit should feel locked in place without excessive force.
Over-tightening has symptoms you’ll notice. The collet nut becomes difficult to remove later — you’re damaging the threads. The bit shank develops tiny stress marks that show up under magnification. Worse, over-tightening distorts the collet fingers enough that they no longer grip uniformly.
Different routers have different collet designs. The DeWalt 618 has a solid collet that works well if you follow procedure. The Bosch 1600 has a pull-down design where you’re pulling the bit deeper as you tighten from below — counterintuitive the first time, but it seats more reliably. The Makita 3709 uses a threaded bit holder that requires a specific sequence: insert bit, thread the holder, then rotate the main spindle lock wrench. I’ve seen people skip the spindle lock and end up with soft seating.
Read your manual. I know that sounds patronizing. But I was handed a Festool 1010 and spent twenty minutes frustrated with collet behavior until I read that the bit required pushing in past an audible click. Changed everything.
Spindle Bearing Play and When to Replace
Once you’ve ruled out collet issues and bit seating, you’re looking at spindle bearing wear. This is invisible until it becomes a problem.
Detect lateral play without an indicator: Mount an unworn straight bit in the collet using perfect procedure — you’re good at this now. Clamp the router to the bench. Grab the bit near its base with your thumb and forefinger. Try to move it side-to-side. Zero movement? Excellent. Slightly springy movement that returns to center when you release? That’s normal preload. Noticeable movement where the bit shifts in the spindle visibly? You’re looking at bearing wear.
Some shops use an old dial indicator to measure lateral play at the spindle shaft directly. Remove the collet nut, mount the indicator against the shaft itself, and measure movement as you apply light side pressure. More than 0.002 inches of drift on a production router is worth addressing.
Here’s the economics: A spindle bearing service for a mid-range router — cleaning, shims, replacement bearings if necessary — costs $150 to $300 depending on your machine and local repair shops. A new router? $400 to $900. If your machine has five years of hard use and bearings are the only issue, service makes sense. If the router is twelve years old and the bearings are just one of three failing systems, replacement is smarter.
A heavy-use shop router running 40 hours per week on production work typically needs bearing service around year 4 or 5. Hobbyist routers running 5 hours monthly might go 10 years without bearing issues. Spindle speed affects it too. Running at 24,000 rpm consistently is easier on bearings than running at full 27,000 rpm all day.
Quick Field Fix vs When to Stop Using That Bit
Decision time. You’ve diagnosed that your bit is deflecting under load. Now what?
First priority: Tighten the collet properly using the procedure above. Second: Swap in a different bit of the same size and profile. Run a test cut. If the tearout vanishes, your original bit is probably fine — the issue was setup. Third: Check collet runout with the new bit. If runout increased, the collet is worn and needs replacement.
If runout stays acceptable and tearout persists? Check spindle bearing play. If lateral play is minimal and everything feels tight, reduce your feed rate by 30 percent and run at a lower spindle speed — 12,000 rpm instead of 24,000. This gives the wood more time to be cut cleanly rather than compressed. It’s not a permanent fix, but it tells you whether the machine itself is the limitation.
Now: Should you re-sharpen the original bit or retire it? A properly sharpened bit costs $8 to $15 if you do it yourself with a diamond stone, or $12 to $25 if you send it out. A new bit of comparable quality runs $18 to $60. If the bit has been in service for six months or longer and you’ve been making production cuts, sharpening is economical. If the bit is relatively new and you’ve confirmed the tearout was caused by machine deflection, retiring the bit is overkill.
One honest admission: Some tearout is wood-species-dependent and acceptable. Figured grain maple with reverse grain always tears a little on the exit. Cherry can be finicky. Plywood veneers chip. That’s not machine failure — that’s material behavior. The difference is between acceptable fuzzing that sands out in 30 seconds versus pronounced splintering and fiber pullout that requires careful scraping or edge re-routing.
Use this framework when you’re standing in the shop at 3 PM with a job that needs to ship tomorrow. Tighten collet, test another bit, measure runout, decide. You’ll probably find the answer in that order.




Stay in the loop
Get the latest crafted wood creations updates delivered to your inbox.