The 25-Degree Default and When to Break It
If you’ve spent any time in a woodworking forum or watched a sharpening video, you’ve heard it: 25 degrees. It’s the gospel angle. The safe harbor. The number every beginner memorizes before they even own a honing stone — like it’s carved into some sacred tablet.
Here’s what nobody tells you: 25 degrees is a compromise, not a law.
As someone who’s rebuilt and resharpened chisels for the better part of a decade, I learned the hard way that the “standard” angle exists because it splits the difference between two competing needs. You want an edge sharp enough to slice end-grain cleanly without crushing the fibers. You also want that edge to survive contact with harder wood without rolling or chipping. Twenty-five degrees does both jobs adequately. It’s the middle child nobody argues with — safe, predictable, unremarkable.
The trade-off works like this: lower angles—say, 20 degrees—give you a thinner wedge shape that cuts more efficiently. That’s why a freshly honed chisel at 20 degrees will glide through softwood like it’s warm butter. The downside? That thin edge dulls faster and can chip when you hit a hard grain reversal or knot. Higher angles—30, 35 degrees—thicken that wedge. The edge becomes nearly unkillable. You can abuse it, hammer it into oak with abandon, and it laughs. But you’ll work harder pushing it through, and the cutting surface becomes blunter.
For hardwoods like oak and hard maple, 25 degrees is genuinely where I stick. These woods demand respect for both sharpness and durability. The grain can be unpredictable and dense. A 25-degree edge gives you enough bite to cut cleanly without being fragile.
The key insight: softwoods change the equation entirely.
Lower Angles for Softwoods and Pine
Pine, spruce, cedar, fir — these are where I experiment downward.
I trim a lot of pine door frames and cabinet edges in my workshop. Last month, I spent three hours fitting a pine frame that was supposed to be pre-milled but wasn’t. The grain was mostly cooperative, just some runout near the ends. I had two chisels handy: one set at 25 degrees (my workhorse), and one at 21 degrees I’d been testing. The 21-degree chisel did the work in about half the effort. No question.
Softwoods have looser grain structure. The fibers compress more easily. You don’t need the wedge thickness to prevent tearout because the wood itself is forgiving. Drop to 20, 21, or 22 degrees, and you get several advantages: the edge cuts with minimal pressure, it feels responsive in your hand, and you can feel exactly what the wood is doing. For paring work—chamfering edges, fitting joints, trimming door bottoms—this angle is superior.
The catch? Edge durability suffers. A 21-degree edge on a pine mortise chisel will dull noticeably faster than the 25-degree version, especially if you’re working through occasional hard knots or hitting the stone accidentally. You’ll hone more often. That’s the trade-off.
My practical rule: if the project is softwood only and finishing-focused, go low. If it’s structural or you’re chopping into grain reversals, stay at 25 or bump higher. For my everyday pine work, I keep a dedicated set of bevel-edged chisels at 22 degrees — a 1/4-inch set and a 3/8-inch that I use constantly. They stay sharp longer than you’d expect because I’m not abusing them, and the cutting ease on straight-grained work is noticeably better than my 25-degree set.
Higher Angles for End-Grain and Figured Wood
Curly maple, walnut with dramatic figure, and any project where you’re paring end-grain — this is where you climb the angle scale.
End-grain is a wild animal. The fibers are cut perpendicular to their length. You’re essentially working against the wood’s strongest direction. Normal grain runout will cause tearout, sure. But end-grain will cause chatter—that vibration where the chisel skitters across the surface, leaving tiny stepped furrows instead of a clean cut. It’s maddening. Increase the angle to 28, 30, or even 35 degrees, and the wedge becomes so thick and stable that chatter nearly disappears.
I learned this on a walnut table leg about three years ago. The design called for a hand-pared mortise at the bottom—end-grain work, curly figure. I started with my standard 25-degree chisel. After the first few strokes, I realized I was fighting the wood. The edge kept chattering. Probably should have opened with this section, honestly, because it’s the most common angle mistake people make. I grabbed a 32-degree old-timer chisel I’d inherited, and the transformation was immediate. Smooth, controlled cuts. The wood just fell away cleanly.
With figured and burly wood, the grain changes direction constantly. A 28 to 30-degree angle is often enough. For pure end-grain work or wood with extreme figure, 30 to 35 degrees stops the chatter and gives you control. You sacrifice some cutting ease—yes, it takes more hand pressure—but you gain predictability. And in end-grain work, predictability is worth its weight.
The feel changes too. A high-angle chisel on end-grain feels almost meditative. The cutting action is slower, more deliberate, but smoother. A low-angle chisel in the same situation feels like you’re wrestling.
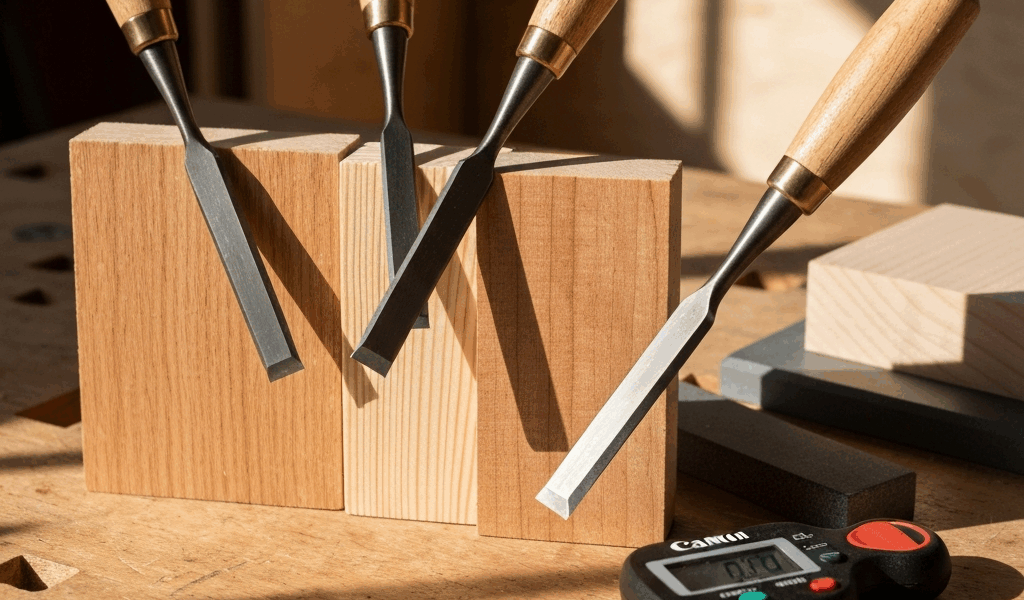
How to Set and Check Your Angle in the Workshop
Setting the angle correctly is half the battle. Doing it repeatably without expensive tools is the other half.
The easiest method: a honing guide. Drop your chisel into a guide, dial the angle to your target (most guides have marked degrees), and hone. This is foolproof if your guide is decent quality and you keep the guide square on the stone. I use a Veritas guide for my critical chisels—runs about $60—and it’s consistently accurate to within half a degree.
Without a guide, you have two paths: reference marks or feel.
For reference marks, I use a permanent marker on the edge of my honing stone. Mark a line at 25 degrees using a simple angle finder or a printed paper template (these are free online). Use that mark as your visual guide while honing. Position the chisel bevel so it tracks along the mark. It takes a few practice passes, but your muscle memory develops quickly. I marked my favorite stone at 20, 25, 30, and 35 degrees years ago. The marks are faded now, but I don’t need them anymore.
For experienced users, feel works. After thousands of strokes, you develop a tactile sense for angle. You feel the chisel’s position on the stone, the resistance, the angle of the bevel. I can set a 25-degree angle without thinking now. But for someone new to honing, feel is unreliable. Don’t make my mistake.
The quick check: backlight. Hold the chisel edge-up to a light source. You’ll see the bevel as a thin silver line. If it looks even and consistent across the whole width, your angle is uniform. If it’s thicker on one side, you’re rocking. This tells you nothing about the absolute angle, but it confirms consistency.
Adjusting Angle Mid-Project: When and Why
Real work doesn’t always match the plan.
You’re 45 minutes into a mortise in walnut. Your 25-degree chisel is chattering worse than a loose brake caliper. The grain is doing something weird. You need a solution now, not tomorrow.
This happens to me maybe once every 10 projects. The wood surprises you. What was supposed to be straight grain turns out to be figured or unstable in ways you didn’t anticipate. Your chisel angle becomes suddenly wrong for the situation.
The first adjustment: go up. Switch to a higher-angle chisel if you have one, or quickly hone the back 2-3 mm of your bevel to 30 or 32 degrees, steepening the angle without a full regrind. You don’t need a perfectly flat 32-degree bevel; a micro-bevel on top of your 25-degree main bevel works perfectly for this. Five minutes on the stone, and you’re back in the mortise with better behavior.
I did exactly this mid-project on a curly walnut chest last spring. Started at 25 degrees, hit some wild grain near the center, switched to a 30-degree chisel I had nearby, and finished clean. No wasted wood, no frustration.
If you’re getting dull edges or crushing fibers (opposite problem—you need lower angle), the switch is riskier mid-project because lower angles are more fragile. Better to accept the slightly harder work, finish the project, and then hone a dedicated lower-angle chisel for the next softwood job.
The pattern becomes this: hardwoods and structural work stay at 25. Softwoods drop to 20-22. End-grain and figured wood climb to 28-35. And if you’re surprised by the wood during work, you’ve got a path to adjust without abandoning the chisel.


Stay in the loop
Get the latest crafted wood creations updates delivered to your inbox.