“`html
Why Workshop Humidity Ruins Chisels Faster Than You Think
Woodworking chisels rusting in workshop humidity is one of those problems that sneaks up on you — honestly, you think you’re being careful. Then you open your tool chest after a humid week and find flash rust stippling the flat surfaces of your A2 steel chisels like some disease you didn’t see coming.
I learned this the hard way. Spent $680 on a set of premium Japanese bench chisels five years ago, and within eighteen months of working in my damp basement workshop, I was staring at surface oxidation that required aggressive intervention. That’s when I actually started paying attention to the metallurgy instead of just hoping the problem would go away.
Here’s what matters: high-carbon steel chisels — especially O1 and A2 tool steels — oxidize aggressively once relative humidity climbs above 60 percent. At 65 percent, you’re looking at visible rust formation within days if the chisel surface isn’t sealed. Push humidity to 70 percent or higher in a poorly ventilated workshop, and you’ll see rust bloom overnight. It’s not gradual. It happens.
But what is rust, really? In essence, it’s iron returning to iron oxide. The iron in your $50 Narex butt chisel or $120 Iyoroi premium blade is structurally identical to the iron in rust — just in a different molecular arrangement. Moisture provides the oxygen and electrolyte needed to complete that transformation. That’s the chemistry, and it doesn’t care how much you paid for the tool.
A2 steel oxidizes slightly more slowly than O1 because of its chromium content, but don’t let that false confidence cost you. A2 chisels in 70-percent humidity still develop surface rust within a week of exposure. Stainless steel chisels (usually budget options) resist rust better, sure — but they’re softer and don’t hold an edge the same way, which is why serious woodworkers use carbon steel. That’s what makes this problem endearing to us tool obsessives.
The financial incentive here matters. A full set of quality bench chisels — four to six pieces from makers like Lie-Nielsen, Blue Spruce, or Iyoroi — costs $400 to $700. Protecting that investment with humidity control costs $40 to $400, depending on your approach. The math is obvious.
Quick Rust Removal Without Damaging Your Edge
Surface rust happens. You’ll find it. The real skill is removing it without grinding away the sharpness you paid a sharpening service to create — or the sharpness you’ve been maintaining yourself.
I’ve tested three methods obsessively over the past few years, and each one has a specific use case. So, without further ado, let’s dive in.
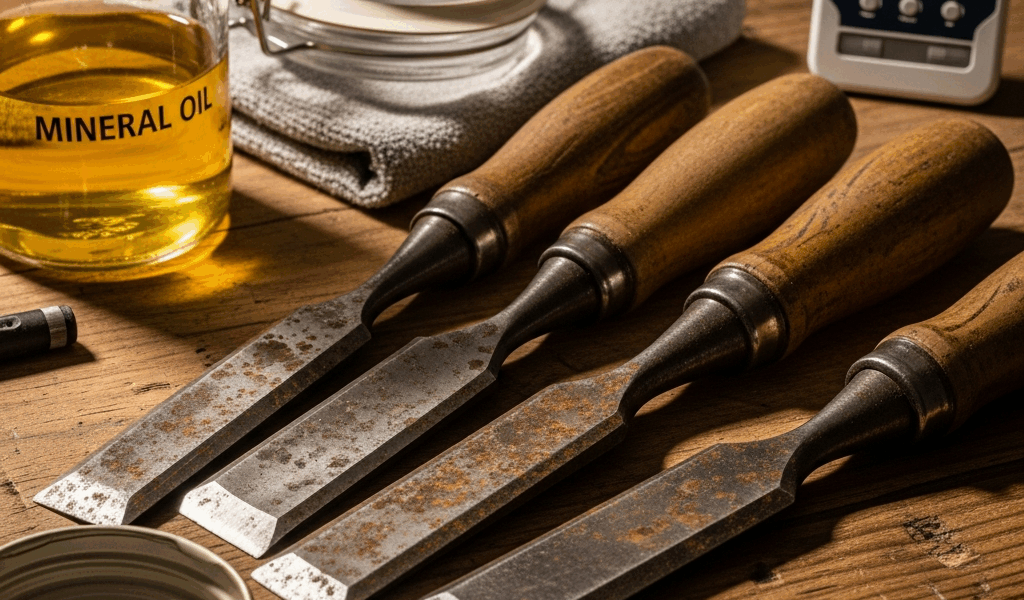
Method One: 0000 Steel Wool with Mineral Oil
This is the gentlest approach. You’ll need 0000 (super-fine) steel wool — not the coarser 000 grade — and a light mineral oil like 3-in-1 or plain sewing machine oil. The Liberon name-brand 0000 steel wool runs about $8 per pad and lasts through several chisels.
Soak a pad in mineral oil until it’s saturated but not dripping. Work perpendicular to the chisel’s edge (parallel to the spine if you’re treating the back) using light circular motions. Pressure matters here — you’re using friction to break the oxidation bond, not pressing hard enough to reshape the surface. This takes five to ten minutes per chisel depending on rust severity. When you’re done, the surface should be clean and gray, with a light oil film remaining.
Why this works? The oil reduces friction and prevents the steel wool from catching on the edge. It’s almost impossible to round over a carefully maintained bevel using this method. The downside is time — it’s slow, and that matters when you have six chisels waiting.
Method Two: Brass Brush Technique
A brass wire brush won’t damage hardened tool steel because brass is softer. Use a handheld brush (not a rotary one — rotating metal against your chisel edge is how accidents happen) and work with short, controlled strokes perpendicular to the edge.
This moves faster than steel wool. A light-to-moderate rust layer comes off in three to five minutes. Brass also doesn’t leave steel particles embedded in your chisel the way steel wool sometimes does. The tradeoff? You need more pressure, so there’s a higher risk of edge damage if you’re not careful. I use this method only for surface flash rust on the flat side, never directly on the bevel. Don’t make my mistake — I learned that lesson on a $180 bench chisel.
Method Three: Fine Abrasive (400-600 Grit)
This is fastest but demands the most skill. Use wet/dry sandpaper — Norton or 3M brands are reliable — in 400 or 600 grit, with a light machine oil or water as lubricant. Work the flat surfaces only, parallel to the edge, using moderate pressure.
At 600 grit with light pressure and proper lubrication, you’re removing rust without changing the surface finish meaningfully. The edge itself stays sharp if you avoid dragging sandpaper across the bevel. Most of my rust removal happens this way because it takes two to three minutes and the results are consistent. I’m apparently someone who values speed, and this method works for me while steel wool never delivered that quickly.
What I don’t do: phosphoric acid products (like naval jelly) tempt you with their speed, but they cause pitting and can undermine the hardened surface layer of tool steel. Vinegar works similarly and leaves a weak rust conversion coating. Both are shortcuts that damage tools worth protecting carefully.
Humidity Control Methods That Actually Work in a Real Shop
Prevention beats treatment. Every chisel you don’t rust is time you don’t spend cleaning it.
Start with measurement — at least if you want to know what you’re actually dealing with. A basic digital hygrometer (the kind that reads temperature and relative humidity on an LCD screen) costs $20 to $40 and should be your first purchase if you’re dealing with rust problems. Mount it at chest height in your workshop and check it daily for two weeks. You’ll see the humidity pattern. Most workshops in North America stay between 40 and 60 percent humidity year-round. Basements spike above 65 percent during spring and summer. Attached garages follow ambient humidity almost exactly.
Once you know your baseline, pick a control method that fits your budget and space.
Low-Cost: Desiccant Packets and Silica Gel
A tool chest or storage box with silica gel packets won’t control workshop humidity, but it will create a microclimate inside the box itself. Buy silica gel containers ($1 to $3 each at hardware stores), place them in your tool storage, and check them monthly. When they turn pink or blue (depending on your brand), bake them in a 250°F oven for thirty minutes to reactivate. This costs almost nothing and prevents rust inside sealed storage containers.
Mid-Range: Dehumidifier Sizing
A small dehumidifier — 50-70 pints per day capacity — costs $150 to $300 and handles a 500-800 square foot workshop effectively. Position it on an interior wall (not near a window where it works against incoming humid air), and empty the water tank daily or run a drain hose into a floor drain.
For a 500 sq ft workshop with humidity above 65 percent, a 50-pint unit brings humidity down to 50-55 percent within a week. Running cost is roughly $30 per month in electricity. A Delonghi or AmazonBasics unit with a built-in hygrometer lets you set a target humidity and have the unit run automatically — that’s the best option, as humidity control requires consistent effort. That is because sporadic intervention doesn’t work.
Premium: Humidity-Controlled Storage Cabinet
If you have expensive chisels and don’t want to dehumidify your entire workshop, a tool storage cabinet with integrated humidity control ($400 to $900) creates a sealed, climate-controlled environment. These are overkill for most home woodworkers, but I know professional shops and serious amateurs who swear by them for high-value tool protection.
Tool Storage Setup to Prevent Rust Between Projects
Probably should have opened with this section, honestly. Good storage prevents rust better than rust removal ever will.
The Light Oil Coat Method
After each use, wipe your chisels with a cloth barely dampened in mineral oil or 3-in-1 oil. The goal is a thin, nearly invisible coat — you’re not creating an oil slick, just a molecular barrier against oxygen and moisture. This takes fifteen seconds per tool. Let the oil dry for five minutes before storing.
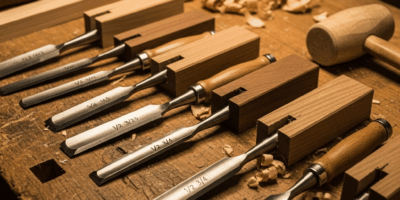
Storage Container Setup
Magnetic strips mounted inside a tool cabinet work well. The magnet holds the blade flat and neutral, which prevents edge contact with wood or other tools. Alternatively, tool rolls with thick canvas pockets ($30 to $60) keep chisels separated and protected. Slot each chisel into its own pocket with the blade facing down and the edge never touching bottom.
Cloth wrapping works too if you use untreated canvas or linen, not plastic, which traps moisture. Wrap each chisel individually, securing the cloth with cotton twine. This is old-school but effective — frustrated by plastic storage trapping moisture, woodworkers have used cloth wrapping for decades using these mundane materials.
Re-oil every two to three months in humid climates, or whenever you see the surface looking dull or dry. The oil film degrades over time, especially if your workshop has air movement or temperature swings.
Signs Your Chisel Has Damage Worth Addressing Now
Not all rust is equal. Sometimes you’re salvaging a tool. Sometimes you’re wasting time on something past recovery.
Surface Flash Rust
This appears as a thin, orange-brown film or stippling on the flat surfaces. Under magnification (use a jeweler’s loupe or 10x magnifier), the surface is still relatively smooth. Flash rust is reversible with any of the three methods above. It doesn’t require re-sharpening. Catch it early and it disappears in five minutes.
Pitting and Edge Corrosion
This is visible as small dark craters in the surface, rough texture when you run your thumb across it (carefully — don’t cut yourself), and sometimes visible damage to the beveled edge itself. Pitting can’t be removed without aggressive grinding, which means re-sharpening. If pitting is deep or extensive, re-sharpening removes so much steel that the tool profile changes and the bevel angle shifts.
I examine chisels with a 10x magnifier under bright light. If pitting is confined to the side surfaces and the edge itself is clean, it’s worth restoring. If the bevel shows corrosion or the edge has a dull or ragged appearance when magnified, retirement might be smarter than restoration. This new idea took off several years into my tool ownership and eventually evolved into the approach serious woodworkers use today.
The decision point is usually simple: Would re-sharpening this tool cost more time and money than replacing it? For budget chisels, replacement is often faster. For premium tools, restoration is always worth the effort.
“`


Stay in the loop
Get the latest crafted wood creations updates delivered to your inbox.