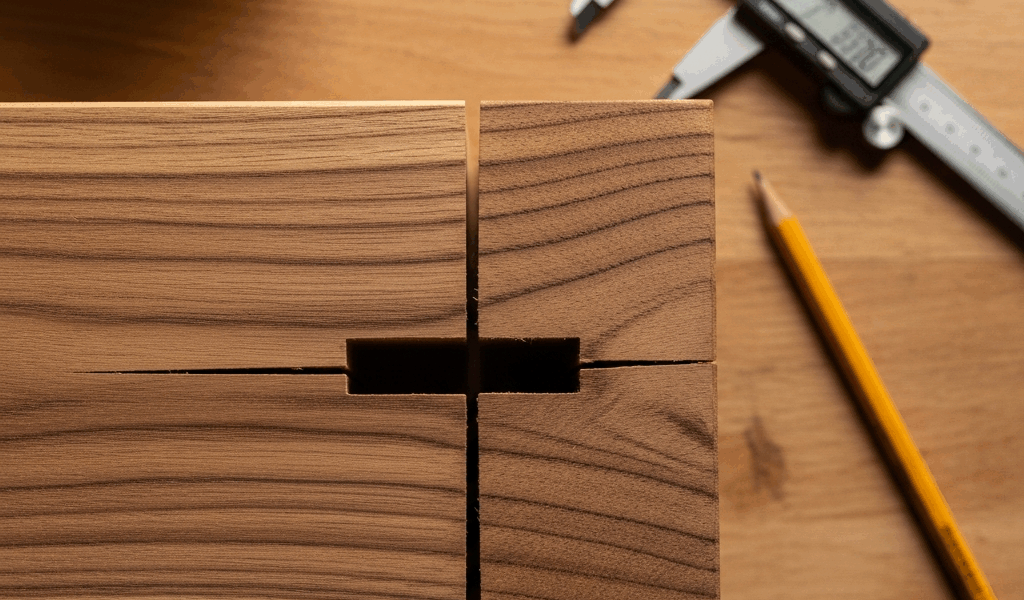
Why Standard Wood Movement Rules Fail in Real Joinery
Wood movement in tabletops and frame-and-panel doors isn’t theoretical — it’s the reason I stood in front of a client three years ago explaining why her walnut frame-and-panel cabinet door had cracked straight down the middle. I’d followed every rule I’d learned. The panels swelled. The mortise-and-tenon frame couldn’t handle it. The generic guidance I’d relied on—”wood moves 1/16 inch per foot of width” or “account for 5% tangential movement”—told me absolutely nothing about her Pennsylvania sunroom, where humidity swung from 35% in winter to 65% in summer.
That’s the gap. Standard percentages assume nothing. They don’t account for your species, your shop’s actual humidity profile, or how your joinery strategy either absorbs or resists that movement. A white oak breadboard end behaves completely differently in Phoenix than in Maine. A cherry tabletop moves differently at each season. Most woodworking references cite movement in percentages, but percentages alone don’t tell you whether to make a tenon 0.010″ looser, 0.025″ looser, or floating entirely. You’re flying blind.
Here’s what changed: I stopped relying on generic rules. I started measuring actual movement in my wood, in my conditions.
Measuring Actual Movement in Your Species and Conditions
Probably should have opened with this section, honestly. Before I size a single joint anymore, I run a 4–6 week test on the exact species I’m using.
Here’s what I do:
- Mill three test boards from the same lumber you’ll use in the finished piece—same thickness, same face direction. One at 6 inches wide, one at 12 inches, one at 18 inches. This reveals whether movement scales linearly with width, which it usually doesn’t.
- Place each board in the environment where the final piece will live. Or your shop, if that’s representative. Don’t seal them yet.
- Measure initial width and length with a digital caliper. Record to 0.01 inch. Mark measurement points with pencil—1 inch from each edge and the center. Width-wise and length-wise both.
- Get a calibrated digital hygrometer. I use the Extech model ($35–50) because you can hang it on the wall and check readings twice daily for weeks. Log the data.
- Measure the test boards every 3–4 days for the first month, then weekly through week 6. Track changes against humidity readings.
What you’re hunting for: the ratio of dimension change to humidity swing. If your shop moved from 40% RH to 60% RH and a 12-inch board widened 0.08 inches, that’s 0.67% movement per 20 percentage-point humidity swing. Radial movement (along the growth rings) is typically half of tangential (across the rings), so note grain direction on each test piece.
Log it in a spreadsheet. Column headers: Date | RH % | Temperature | Board 1 Width | Board 2 Width | Board 3 Width | Notes. After six weeks, you’ll see the actual pattern. Length movements are usually negligible—rarely more than 0.01 inch in a 24-inch board—but always measure anyway.
This data becomes your design constraint. Not a generic table.
Slot and Tenon Sizing for Panel Expansion Without Racking
Once you know your species moves 0.75% with a 20-point RH swing, and your local humidity typically swings 30 points seasonally, you’re dealing with roughly 1.1% movement per season.
For a 24-inch-wide panel, that’s 0.26 inches of swing. You need to account for it in your joint design.
The traditional approach—fixed mortises and rigid frames—forces the panel to crack or the frame to rack. Neither is acceptable. Instead, I size floating tenons to move within the mortise.
The math is straightforward: if your panel will expand 0.26 inches, and you want symmetrical float (half on each side), each side gets 0.13 inches of clearance. That means your tenon must be 0.26 inches narrower than the mortise slot.
But you don’t want sloppy fit. I make the tenon 0.015 inch tight radially (to resist racking) and 0.26 inch loose tangentially (to allow panel movement without binding). This balance matters.
Practically: if your mortise slot is 0.50 inch wide, your tenon is 0.24 inch wide. The panel sits in a groove that’s 0.01 inch looser than the panel edge, so it can slide as it expands.
For hand-plane work: I use a #4 or #5 plane to trim tenon thickness to within 0.002 inch. A straightedge and light under the tenon tell me where high spots are hiding. For mortise slots, I chop to within 0.01 inch and use a router plane or plow plane to fine-tune width. Chisels alone are too forgiving for this tolerance.
The groove depth also changes—don’t just follow “1/3 the panel thickness.” If your panel is 0.75 inch thick and will expand 0.08 inch radially (thickness doesn’t typically change much — movement is width-wise), you want groove clearance of 0.01–0.02 inch at the tightest season. Measure your panel at driest and wettest seasons, then set groove depth to grip at the driest point with 0.02 inch slack at the wettest.
Frame and Panel Construction When Movement Data Matters Most
Frame-and-panel doors are where this gets real. The frame is rigid. The panel must move.
Say you’ve measured and learned: your solid walnut panel in a frame will swing 0.20 inches across its 20-inch width seasonally. Your groove is 0.375 inch deep.
Set initial panel-to-groove clearance this way:
- Measure your panel width at the wettest time of year (or simulate it by conditioning wood to 12% MC in a kiln or humid chamber).
- The gap between panel edge and groove bottom should be 0.10 inch (half your measured swing) plus 0.02 inch safety margin. Total: 0.12 inch.
- When the wood dries and shrinks, the panel pulls back, and you’ll see a 0.12 inch gap. That’s expected and normal.
For breadboard ends on a tabletop—this is trickier because the breadboard itself is structural. I use floating mortise-and-tenon again, but the mortise goes through the breadboard at the center and only through the top outer inch on each end. The tenon is free-floating in the outer mortises but snug in the center mortise. This allows the top to expand sideways without racking the breadboard.
Real dimensions: 42-inch-wide cherry top, measured movement 1.2% per 25-point RH swing, expected seasonal swing 0.50 inch. Center tenon is 0.75 inch long and fitted tight (0.002 inch clearance). End tenons are 1 inch long, fitted loose (0.30 inch clearance—accounting for 0.50 inch spread motion, with margin). The breadboard is 2.5 inches wide, so the end mortises are mortised only 1 inch deep, leaving 1.5 inches of solid grain at the edge to resist panel cupping, not shear stress.
Seasonal Adjustments and Re-Fitting Strategies
After installation, the work doesn’t end. Doors that fit perfectly in May might stick in August if humidity spikes.
For frame-and-panel doors, I keep a caliper and hygrometer reading log for the first year. If a door is sticking seasonally, the first check is humidity. If the shop was 35% RH when I fitted it and is now 60%, the panel probably expanded. I don’t plane the stiles or rails—that’s permanent damage. Instead, I plane the panel edges slightly (0.01–0.02 inch) to restore clearance, knowing it will shrink again when humidity drops. It’s reversible.
Tabletop edges get the same treatment. A breadboard end that’s tight against a top in winter will loosen in summer. If the breadboard is binding, I measure the gap at the loose end, note the current humidity, and revisit it in three months. Usually, seasonal fit normalizes on its own.
What’s not normal: gaps that open asymmetrically, cupping across the panel face, or joints that loosen after a month. Those signal either miscalculated movement or wood that wasn’t acclimated before joinery. That’s a flaw. Revisit the acclimation step next build.
The core strategy: use measurement, not memory. Track your wood. Size your joints to the data. Accept seasonal fit shifts. You’ll stop chasing the “perfect” fit and start building doors that actually survive their environments.




Stay in the loop
Get the latest crafted wood creations updates delivered to your inbox.