My desk was drowning in clutter. Cables everywhere, sticky notes covering every surface, a drawer that wouldn’t close because of all the stuff I’d shoved in there. The solution wasn’t better organization habits – let’s be honest, those weren’t coming. The solution was a monitor riser with hidden storage underneath. One build solved three problems: screen ergonomics, cable management, and a place to stash things where I couldn’t see them.
The Hidden Storage Advantage
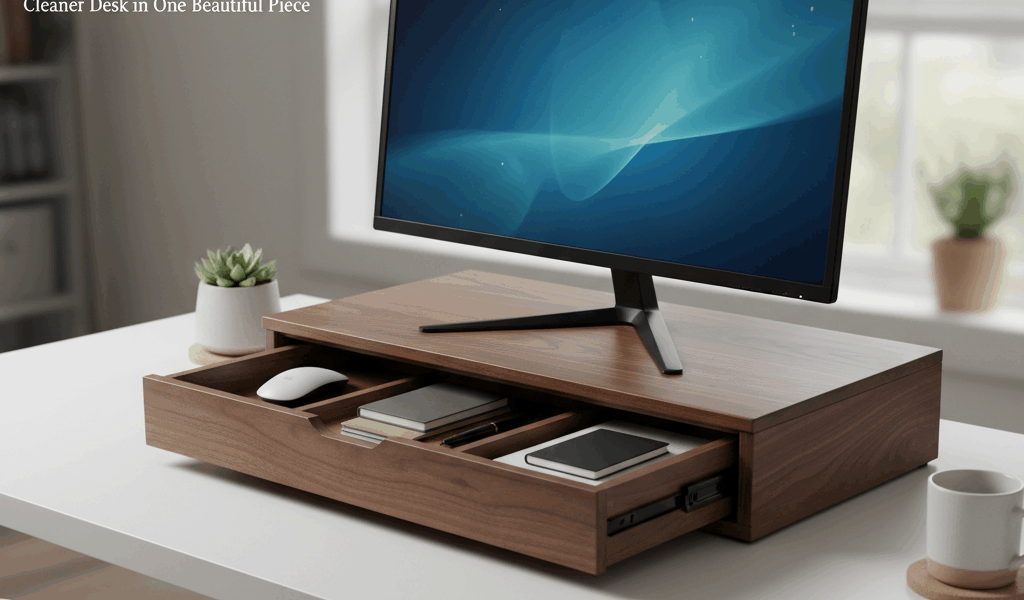
Commercial monitor risers are either solid blocks that waste the space underneath or cheap plastic things with ugly visible compartments. This design keeps everything clean – a solid front face with a completely open back. You slide things in from behind, they disappear from view, but they’re still right there when you need them.
The space underneath easily swallows a keyboard, a streaming deck, wireless earbuds, chargers, notepads, and all those cables that otherwise snake across your desk. Out of sight, still within reach.
Sizing for Your Setup
Measure your monitor’s stand footprint first – the riser needs to be wider than this to be stable. Most monitors have stands about 8″ to 10″ wide, so a 24″ wide riser works for virtually any single-monitor setup. For dual monitors, go 36″ or wider.
Height should lift your screen center to roughly eye level when you’re sitting in your normal position. For most people, that’s 4″ to 6″ of lift. I went with 5″ and it’s been perfect.
Depth needs to be at least as deep as your monitor stand, plus enough to be stable. 10″ to 12″ works for most situations.
Construction: The Basic Box
The riser is essentially a rectangular box with one side missing (the back). Top and bottom are 24″ x 11″ panels. Sides are 5″ x 11″ rectangles. Front is a 24″ x 5″ panel. All pieces are 3/4″ plywood with hardwood edge banding, or solid hardwood if you’re feeling fancy.
For plywood construction, quality matters. Baltic birch or cabinet-grade plywood gives clean edges. Construction plywood has voids and tearout that look terrible.
Join the pieces with pocket screws from underneath – completely invisible in the finished piece. Glue all joints for strength. The box should be absolutely rigid when assembled; any flex will only get worse over time.
Edge Treatment
If using plywood, edge banding transforms the look from “shop project” to “furniture.” Iron-on veneer edging is the quick solution – apply it with a household iron, trim with a sharp knife, and sand smooth. For a more substantial edge, glue thin strips of hardwood to all exposed edges before assembly.
Solid hardwood eliminates this step entirely but increases cost and weight. Your call based on your priorities.
Cable Management Features
Cut a slot or series of holes in the top near the back edge. This is where cables drop down into the hidden space below. I use a 1″ x 6″ slot, but individual 1″ holes work equally well and look cleaner.
Add a power strip mount inside if you want to take cable management to the next level. This puts power right under your monitor, so devices charge in the hidden compartment without cables ever crossing your desk surface.
Anti-Slip Details
Monitors shouldn’t slide around, especially on a raised surface. Add non-slip pads to the top surface – self-adhesive rubber or silicone dots from the hardware store. Position them where your monitor’s feet will sit.
The riser itself needs grip on the bottom too. Adhesive felt or rubber feet prevent it from walking across your desk and protect the desk surface from scratches.
Finishing
Match your desk finish if possible. For natural wood looks, an oil-based polyurethane in satin gives durability without excessive shine. For painted finishes, a quality spray lacquer in black or white matches most modern office furniture.
Don’t skip finishing the inside surfaces. They’ll collect dust and occasional spills – a sealed surface wipes clean easily. One coat inside is enough; go with two or three on visible exterior surfaces.
Installation and Loading
Position the riser on your desk with the open back facing you (unless your desk faces a wall). Place your monitor on top, run cables down through the slot, and start filling the compartment underneath.
For maximum cleanliness, use short cables or cable ties to keep everything contained. The goal is to have only necessary cables emerging from the back and running to their destinations.
The difference is immediate. Where there used to be a tangle of cables and a collection of small items competing for attention, there’s now a single clean surface with your monitor floating above it. Everything you need is still there, just hidden. That’s the trick – organization without effort, achieved through smart design rather than better habits.
Build time runs about three hours. Materials cost $30 to $50 depending on your wood choice. The return in desk sanity is, frankly, priceless.


Stay in the loop
Get the latest crafted wood creations updates delivered to your inbox.