How to Make Built-in Shelves
Building built-in shelves has gotten complicated with all the opinions about materials and installation methods flying around. As someone who has built multiple sets of built-ins — including one that required three attempts to get the framing level — I’ve learned what actually matters for a unit that looks intentional and holds up over time. Today, I’ll share the whole process.

Read the Space Before You Draw Anything
Don’t start with a design. Start with measurements. Height, width, depth — all three, at multiple points. Walls are rarely perfectly plumb, floors are rarely perfectly level, and corners are rarely perfectly square. Every one of those conditions affects how you build and install the unit. Locate your electrical outlets, air vents, and baseboards. Sketch the obstruction map before you sketch the shelving design.
The Design Comes From the Space and What You’re Storing
Shelf spacing should be dictated by what goes on them. Standard paperback books need about 8 inches of clear height. Larger hardcovers need 10-12. Decorative objects and baskets are all over the map — measure your tallest items before you commit to shelf positions. A depth of 12 to 14 inches handles most uses. Deeper than 14 inches and things get lost at the back; shallower than 10 and you’re limiting what will fit.
Match the unit to the room. If the room has 3/4-inch door and window casing, run the same casing as face trim on the built-in. If the walls are painted white, paint the built-in white. The goal is for it to look like the house grew it there, not like you carried it in from a store.
Materials for the Build
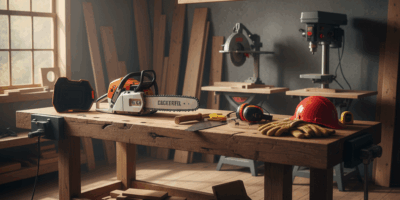
3/4-inch birch plywood for the carcase — sides, top, bottom, and shelves. It’s flat, stable, and takes paint well. MDF works too but it’s heavy and the edges telegraph through paint if you don’t fill them. For painted built-ins where budget matters, MDF is fine; for anything with a natural finish, use plywood. Keep a stud finder, level, drill, circular saw, and finish nailer in reach. Pre-drill everything near edges to avoid splitting.
Cut List Before Any Cuts
Write down dimensions for every piece before the saw comes out: side panels, top and bottom panels, each shelf, and the back panel if you’re including one. Check everything twice. A wrong number on the cut list wastes a full sheet of plywood and an hour of work. I write measurements in pencil on masking tape stuck to each piece after cutting — keeps them matched to the right location without having to remember which is which during assembly.
Prepare the Wall
Remove any existing shelving. Patch and sand wall areas that will be visible above or beside the new unit. Find and mark your studs — not just with the stud finder mark but with a pencil line I can see from six feet away during installation. The unit gets screwed to those studs and you don’t want to be hunting for them when you’re holding a heavy carcase against the wall.
Build the Frame Square
Assemble sides and bottom first, then top. Glue and screw at every join. Check diagonal measurements for square before the glue sets — if the diagonals match, the frame is square. If they don’t, clamp across the long diagonal to pull it into square. A frame that’s out of square will rack, and every door or drawer you add to it later will fight you as a result.
Shelves Level, Every One
Pre-drill for shelf pins or screw shelves in place, checking level on each one individually. A shelf that looks close is often not close enough once it’s loaded. I use a 24-inch level on every shelf. Takes an extra thirty seconds per shelf and the difference shows up every time you put something on the shelves.
Installation
Lift the unit into position — get help for anything taller than 6 feet. Drive long screws through the back into the wall studs. Check level and plumb after it’s against the wall; walls being what they are, you may need to shim at the base or sides. Use finishing nails at any contact points where the unit meets the wall to pull it flush and close any gaps.
Finishing
Prime before painting — always, even on pre-primed MDF. It seals the surface and gives the topcoat something to stick to. Apply paint in thin coats and let each coat dry fully. Thick coats sag. I sand lightly with 220-grit between coats and the final surface is noticeably smoother than skipping that step.
Fill gaps at the wall with paintable caulk, not wood filler — caulk handles the seasonal movement that cracks rigid fillers over time. Touch up after it dries. Then put things on the shelves.