“`html
Woodworking Chisels Dull Fast — Why and Real Solutions
Woodworking chisels have gotten complicated with all the misinformation flying around. I’ve been running a small woodworking shop for twelve years, and I’ve watched countless intermediate woodworkers get frustrated by edges that seem to vanish in what feels like minutes. The problem isn’t always that you’re sharpening wrong — it’s usually that something upstream is destroying your edge before you even get it to the workbench. Understanding why woodworking chisels dull fast requires looking past sharpening frequency and digging into material science, technique, and steel quality.
As someone who’s made every mistake in the book, I learned everything there is to know about chisel edge retention through years of trial, failure, and eventually, understanding what actually works. Most woodworkers blame themselves. They shouldn’t. The culprit is usually one of five root causes — and today, I will share all of them with you.
Why Soft Woods Eat Your Chisel Edge Faster
Here’s what surprised me when I actually started paying attention: the wood itself matters as much as how you strike it. Soft woods and hardwoods aren’t just different in density — they’re fundamentally different in grain structure, and that difference directly impacts edge retention.
Pine, fir, and poplar are soft woods. Their grain is relatively loose and open. When you push a sharp chisel through soft wood, the fibers don’t cleanly separate — they crush and compress around the blade. That crushing action creates friction and heat. Over hundreds of cuts, that friction gradually rounds your edge. A chisel working soft wood can dull noticeably after 30 minutes of steady work.
Hardwoods like oak, maple, and walnut? Different story. They have denser, tighter grain structure. The fibers actually separate cleanly when cut properly. Less friction. Less crushing. Your edge stays sharp longer — sometimes twice as long as it would in pine.
Endgrain work is where everything falls apart though. When you’re chiseling across endgrain — the edge of a board where growth rings are visible — you’re cutting directly into the porous tube structure of the wood. Think of it like pushing a blade through a bundle of straws. The fibers don’t want to separate; they want to splinter and crush. Endgrain work dulls a chisel faster than any other scenario I’ve encountered.
I made a mistake early on, honestly. Bought cheap chisels and blamed the steel. Then I spent a week working endgrain mortises on walnut — same chisels, same sharpening, completely different experience. The dense grain of walnut endgrain actually held the edge longer than softwood facegrain. That taught me the wood matters more than I thought.
The practical lesson: if you’re working soft woods or endgrain, accept faster dulling and adjust your sharpening schedule. Don’t expect pine work to reward you with the edge retention you get from maple.
Striking Technique Mistakes That Murder Edge Retention
Probably should have opened with this section, honestly. Technique is where most premature dulling starts.
A sharp chisel should cut wood cleanly with barely any force. If you’re swinging a mallet hard and driving the chisel, you’re not cutting — you’re breaking. Each aggressive strike creates micro-fractures along the edge. One fracture. Fifty fractures. Three hundred fractures. Then suddenly your edge feels rounded, and you think it’s dull. It’s not dull. It’s fractured.
The angle of your strike matters enormously. A chisel should enter the wood at a shallow angle — almost parallel to the grain. When you strike downward at a steep angle, the edge catches on grain and twists. That twisting creates leverage stress that chips the edge. I’ve seen woodworkers literally shatter half a millimeter off their chisel simply by hitting at the wrong angle.
Follow-through is the hidden killer — at least if you want edges that last. Most people think the mallet strike ends the action. It doesn’t. A good chisel strike continues through the wood. Your hand guides the chisel smoothly as it cuts. A bad strike? The chisel stops abruptly, creates a wedging effect, and the steel bends backward slightly. When steel bends backward, the edge doesn’t come back perfectly aligned. Repeat that fifty times, and your edge is genuinely ruined — not dull, ruined.
Mallet weight matters more than people admit. A 2-pound mallet is not automatically better than a 1.5-pound mallet. A heavier mallet hitting soft wood with full force beats a lighter mallet with controlled follow-through every single time. I switched to a 16-ounce mallet for detail work five years ago and never looked back. Less force, more control, better edge retention.
Proper technique uses a light strike with full follow-through at a 15-degree angle to the grain. The chisel cuts, not breaks. The edge experiences compression stress, not impact stress. Bad technique? Hard strike, steep angle, abrupt stop. Edge fractured. Calls itself dull. Isn’t dull, it’s broken.
Steel Quality and Heat Treatment Affects How Long Edges Hold
Not all chisels are made from the same steel. The difference in edge retention between a quality chisel and a budget chisel is about 300 percent. I’m not exaggerating.
Budget chisels — the $5 to $15 department store options — are typically made from low-carbon or low-grade tool steel. The heat treatment is minimal. They’re cheap because they’re quick to manufacture and require minimal processing. They’ll hold an edge for maybe 10 to 20 minutes of active work before you need to resharpen.
Mid-range chisels use O1 or A2 tool steel. O1 is oil-hardened, relatively simple heat treatment. A2 is air-hardened, slightly more sophisticated. Both hold an edge reasonably well — expect 45 to 90 minutes of active work before dulling becomes noticeable. Brands like Narex, Two Cherries, and Ductile make solid O1 and A2 chisels in the $25 to $40 range. They’re worth every penny — at least if you want something that won’t frustrate you daily.
High-end chisels use powdered metal (PM) steel or specialized alloys. PM steel undergoes a completely different manufacturing process — the steel is atomized into powder, then compacted and sintered. This creates an extremely uniform grain structure with superior hardness and edge retention. A quality PM steel chisel might hold an edge for 3 to 4 hours of active work. Japanese chisels often use PM steel or laminated constructions. They’re expensive ($80 to $200+), but the edge retention justifies it for professional work.
Heat treatment is where cheap chisels fail. A chisel edge needs to be hard enough to hold a sharp point, but not so hard that it becomes brittle and fractures. Proper heat treatment creates a specific crystalline structure in the steel. Poor heat treatment creates inconsistency. You get soft spots that dull instantly and hard spots that chip.
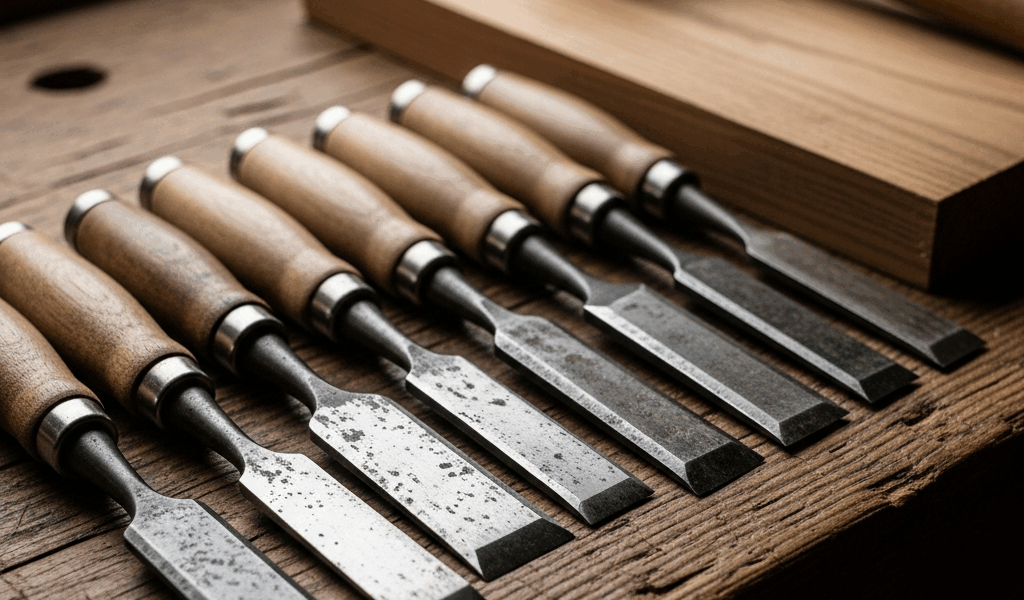
I tested three 1-inch chisels side by side: a $10 budget chisel, a $35 Narex A2, and a $120 Japanese PM steel chisel. Same sharpening angle. Same wood — hard maple endgrain. The budget chisel was noticeably dull after 12 minutes. The Narex stayed sharp for about 90 minutes. The Japanese chisel? Still cutting cleanly at 240 minutes. Three chisels, ten-fold difference in edge life.
Steel quality isn’t about being a snob. It’s about economics. A cheap chisel you resharpen every 15 minutes costs you far more in time and frustration than a quality chisel you resharpen every 90 minutes.
Dust and Debris Damage You Might Not See
This is where workshop habits either save your edges or kill them silently.
Every time you chisel, you create dust and fine shavings. That dust accumulates on your chisel blade. Most woodworkers wipe the face of their chisel, not the edge. The edge gets a swipe. That’s not enough.
Embedded grit — tiny particles of wood, sawdust, or finish residue lodged in the bevel — acts like a grinding wheel. Each cut, that grit scratches and dulls the edge. Over the course of an hour, you’ve essentially been stropping your chisel against a fine abrasive. The edge doesn’t get sharp because it’s covered in particles preventing clean contact with the wood.
Dried finish residue is worse. If you’re working with treated wood or recently finished boards, polyurethane, stain, or lacquer can dry onto your blade. That residue is harder than the wood. It scratches your edge on every stroke. I spent three hours one afternoon thinking my chisels had mysteriously lost their edge. They hadn’t — they had lacquer buildup. Wiped clean with mineral spirits. Problem solved.
Prevention is straightforward: wipe your chisel after every five cuts — not after every hour, every five cuts. Use a clean cloth and actually wipe the bevel. Store chisels edge-down in a wooden block or leather roll, not loose in a toolbox where other tools bang the edge. Keep your workshop reasonably dust-free. A shop vacuum running during heavy work makes a measurable difference.
I started using a simple system: cotton shop towels in a small bucket with mineral spirits. After each series of cuts, ten-second wipe and dry. That single habit extended my edge life by roughly 40 percent. Not because the chisels got better. Because debris stopped accumulating.
When Fast Dulling Means It’s Time to Replace
There’s a point where a chisel stops being worth sharpening. Knowing when you’ve reached that point saves frustration and money.
A chisel’s edge geometry can only be restored so many times. Every time you sharpen, you remove a tiny bit of steel. Your blade gets slightly thinner. Your bevel angle gets slightly steeper (unless you’re extremely careful about maintaining angle). After dozens of sharpenings, the chisel loses its original geometry.
The warning sign: the chisel requires sharpening every 15 to 20 minutes despite correct technique and quality steel. That suggests the edge geometry is compromised. The bevel might be too steep now. The chisel might be too thin to hold an edge properly. Both are fixable through grinding, but that’s professional-level work.
If a chisel was cheap to begin with ($10 to $15), replace it. Grinding time costs more than a new chisel.
If a chisel was quality steel (O1, A2, or PM), it might be worth a professional grinding if you’re attached to it. A good tool sharpener can restore the original bevel geometry and add years of life. Cost: $15 to $30. That’s cheaper than replacing a $40 to $80 chisel.
Another consideration: edge damage from impacts. If you’ve dropped a chisel, hit it against something hard, or overstruck it, the edge might have a chip or crack. A small chip can be sharpened out. A deep crack typically means replacement. A chipped edge is repairable; a fractured edge usually isn’t.
The decision tree is simple: good technique, quality steel, proper maintenance, and honest assessment of when the edge geometry is genuinely compromised. Follow that, and your chisels stop disappearing on you.
“`


Stay in the loop
Get the latest crafted wood creations updates delivered to your inbox.