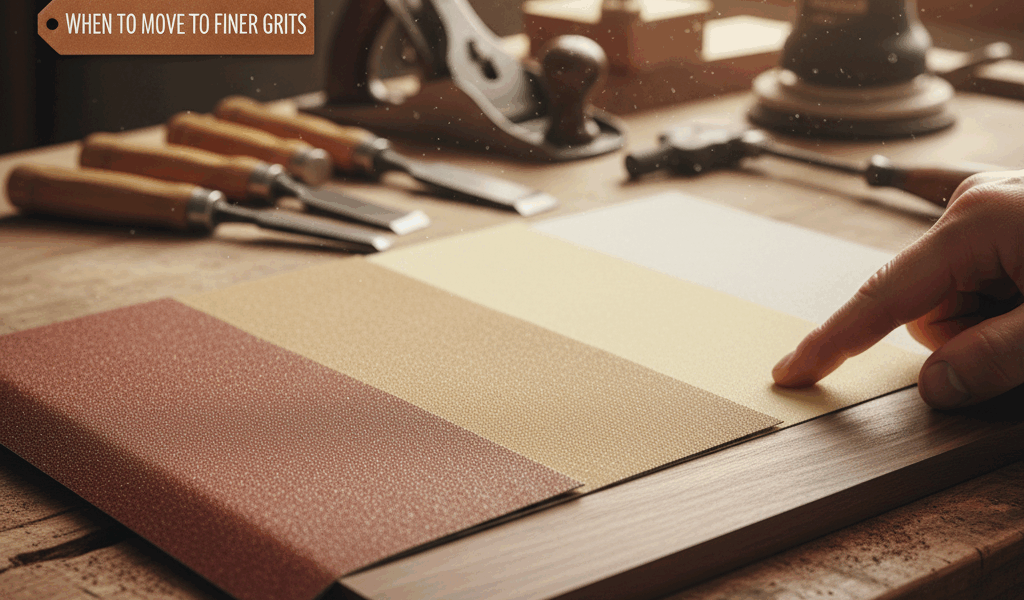
Sanding progression determines surface smoothness and affects how well finishes adhere and appear. Skipping grits leaves visible scratches that telegraph through stain and clear coats. Moving to finer grits too slowly wastes time and paper. Here’s how to sequence grits efficiently.
Starting Grit Selection
Start with the coarsest grit that removes defects without creating unnecessary work. For rough-sawn lumber or heavily milled surfaces, 80-grit removes mill marks and flattens high spots efficiently. For planed lumber with minimal defects, start at 120-grit.
Never start coarser than needed. Using 60-grit on wood that only needs 120-grit creates deep scratches that require additional steps to remove. Each unnecessarily coarse grit adds time to the overall sanding process.
The Grit Skipping Rule
Progress through grits by doubling the grit number: 80 to 150 to 220 to 320. This provides adequate scratch removal at each step without wasting time on intermediate grits. Skipping larger gaps—like 80 to 220—leaves scratches from the coarse grit that the fine grit can’t remove effectively.
The exception is between very coarse grits where you can skip more aggressively: 60 to 100 to 150 works because the deep scratches from 60-grit are still accessible to 100-grit. Once you reach 120-grit and finer, maintain closer progression.
Hardwood vs Softwood
Hardwoods like oak, maple, and walnut typically finish at 180-220 grit for most applications. Going finer closes the pores and can actually reduce stain absorption, creating a lighter, more washed-out appearance. The tight grain structure shows minimal improvement beyond 220-grit for common finishes.
Softwoods like pine and poplar benefit from sanding to 220-320 grit. The softer wood compresses under coarse grits, and the deeper scratches show more readily under finish. The finer grit minimizes this compression damage and produces smoother results.
When to Move to Next Grit
Sand with each grit until scratches from the previous grit disappear completely. Check by wiping the surface with mineral spirits, which temporarily darkens the wood and makes scratches visible. Look at the surface from a low angle under bright light to spot remaining scratches.
Don’t rush this inspection. Moving to the next grit while scratches remain means those scratches will persist through subsequent grits and show in the finished project. Better to spend an extra minute with the current grit than discover the problem after finishing.
Sanding Direction
Sand with the grain whenever possible. Cross-grain scratches are deeper and more visible than with-grain scratches. If you must sand across the grain to remove defects, drop back one grit level when you return to with-grain sanding to remove the cross-grain scratches.
For example: If you sand cross-grain with 120-grit to level a glue line, your next step should be 120-grit with the grain, then proceed to 150-grit. This removes the cross-grain scratches before moving to finer grits.
Final Grit for Different Finishes
For oil finishes (tung oil, Danish oil, boiled linseed oil), stop at 180-220 grit. These penetrating finishes need open pores for good absorption. Sanding finer closes pores and reduces the finish’s ability to penetrate properly.
For film-building finishes (polyurethane, lacquer, shellac), you can sand to 220-320 grit. The finish builds on the surface rather than penetrating, so pore structure matters less. The smoother surface reduces the texture that shows through thin finish coats.
For paint, 150-180 grit provides adequate smoothness. Paint hides surface texture better than clear finishes, so ultra-smooth surfaces don’t improve the final appearance. Save time by stopping at these grits rather than continuing to 220 or beyond.
Between-Coat Sanding
After the first coat of finish dries, sand lightly with 320-400 grit to remove dust nibs and surface roughness. This smoothing improves subsequent coat adhesion and final appearance. The goal is surface preparation, not material removal.
Use light pressure—just enough to dull the surface sheen. Heavy pressure cuts through the finish coat and exposes bare wood, requiring additional coats to achieve even color and protection.
Power Sander Considerations
Random orbital sanders need coarser grits than hand sanding to cut efficiently. Start one grit coarser than you would by hand—100-grit instead of 120-grit—because the random action is less aggressive than hand sanding’s directional strokes.
Belt sanders cut very aggressively. Start one or two grits finer than you think you need to prevent oversanding. An 80-grit belt sander cuts like 60-grit or coarser when hand sanding. The continuous belt action and high speed remove material rapidly.
Paper Wear Timing
Replace sandpaper when it stops cutting efficiently. Worn paper generates heat rather than removing material. You’ll feel increased friction and see less dust production. Continuing with worn paper burnishes the wood surface rather than abrading it, creating a glazed surface that resists finish absorption.
Plan on changing paper every 5-10 minutes of active sanding depending on wood hardness and grit coarseness. Coarse grits wear faster than fine grits. Hard woods dull paper faster than soft woods.
Edge Treatment
Sand edges to the same final grit as faces. Edge grain shows scratches more readily than face grain due to the exposed end grain on the edge corners. Some woodworkers go one grit finer on edges—to 320-grit when faces receive 220-grit—to compensate for this increased visibility.