Router Table Fence Not Square — Diagnose and Fix It
Router table alignment has gotten complicated with all the conflicting advice flying around. As someone who has chased bad profile cuts across three different router table setups over the years, I learned everything there is to know about fence misalignment the hard way. Today, I will share it all with you.
Last month I spent a solid hour blaming a carbide bit for tearout on a walnut edge profile. Swapped the bit twice. Adjusted feed rate. Tried a different collet. The cuts still looked wrong up close — ragged on one end, clean on the other. Turned out my fence face had drifted 0.008 inches out of perpendicular to the table surface. Eight thousandths of an inch. Wrecked an entire afternoon.
But what is a “fence not square” problem, exactly? In essence, it’s a misalignment between your fence and either the table surface or the miter slot. But it’s much more than that — because these are actually two completely separate failures that feel identical while you’re cutting and require totally different fixes. A fence can tilt in or out relative to the table surface. Or it can angle away from parallel to your miter slot. Both ruin cuts. Neither announces itself clearly until you go looking.
That’s what makes fence diagnosis endearing to us router table woodworkers — it rewards methodical thinking over guesswork. So, without further ado, let’s dive in.
How to Tell Which Alignment Is Actually Off
Don’t touch an adjustment knob yet. Not one.
A fence running out of parallel with the miter slot creates a tapered edge profile. The bit contacts your workpiece at slightly different distances across the full length of the cut. Run a 3-inch board through and you might see the detail crisp at the leading end, blurry and undefined at the trailing end. The face of the board will look straight. The profile will be inconsistent — and that inconsistency is your clue.
A fence face leaning in or out does something different. The workpiece sits cocked at a slight angle against the bit. Both top and bottom edges of your profile come out malformed simultaneously. The board won’t sit flat against the fence under cutting pressure, either. You’ll hear it — chatter, small skips, a faint rocking sound mid-pass. The profile might look almost acceptable for the first inch, then fall apart completely as hand pressure shifts position.
Here’s the diagnostic I use: run a test cut on scrap with a quarter-round bit or a straight bit — nothing complicated. Steady feed rate, no pausing. Then look at three things. First, is the profile consistent along the full length, or sharp on one end and fuzzy on the other? Second, did the workpiece face stay planted flat against the fence throughout the cut? Third, do the top and bottom of the profile match each other?
Profile inconsistent along the length — fence isn’t parallel to the miter slot. Top and bottom both bad but the badness is consistent — fence face is tilted. Workpiece chattered or bounced — perpendicularity is your problem. Write down what you see before you start adjusting anything.
Checking the Table Surface Before You Blame the Fence
Probably should have opened with this section, honestly.
A sagging or bowed router table top makes every fence adjustment you do completely pointless. You dial in perfect alignment at one spot, move six inches down the table, and it’s crooked again. I see this constantly on MDF-core cabinet tables — the 3/4-inch core compresses under the weight of a cast iron split fence, especially at the outfeed end. Over time, that compression becomes permanent deflection.
Grab a known-flat straightedge and check the table surface before anything else. I use a 48-inch aluminum straightedge — paid $38 for it at a machinist supply, and it has lived on my bench ever since. Lay it along the miter slot. Look for light gaps underneath it. Run it perpendicular to the slot. Check it diagonally both directions. On contractor-style cabinet tables, pay close attention to where the wing extensions bolt on — those joints are flex points that sag under load faster than the main top.
Any bow or sag beyond 0.010 inches across the working area means the table itself is your problem. Cross-bracing underneath can help. Epoxy shims on the underside work for small corrections. A table top that has simply given up after years of use needs replacing — no amount of fence shimming overcomes a warped foundation.
Fixing a Fence That Isn’t Parallel to the Miter Slot
Table confirmed flat? Good. Now get a dial indicator and a miter slot bar.
Seat the indicator bar in the miter slot so the indicator plunger contacts the fence face. Zero it at the front edge of the fence. Drag it slowly — and I mean slowly — the full length of the table while keeping contact with the fence face. Note the total variance. Under 0.005 inches is workable for general profiling. Past that, you are cutting tapered edges and wondering why your profiles look hand-carved.
The actual fix depends on what fence you’re running. On a T-track mounted fence, there are usually adjustment bolts at the rear — look behind the fence body where it contacts the table. Loosen the front clamp completely first. Then loosen the rear bolts just enough to slip feeler gauge material or a playing card underneath. Tighten the front clamp. Re-check with the dial indicator. Repeat.
On fences with fixed anchor points, shimming happens at the clamp block rather than the fence body itself. Loosen the clamp, work your shim material under it, tighten, re-measure. Expect three to four iterations before you land inside tolerance. It’s tedious — but it works, and it stays put.
Write down your shim positions when you’re done. Fence systems shift slightly with seasonal humidity changes. Documentation means you’re not starting from scratch next January.
Fixing a Fence Face That Leans In or Out
Perpendicularity problems need a different tool entirely.
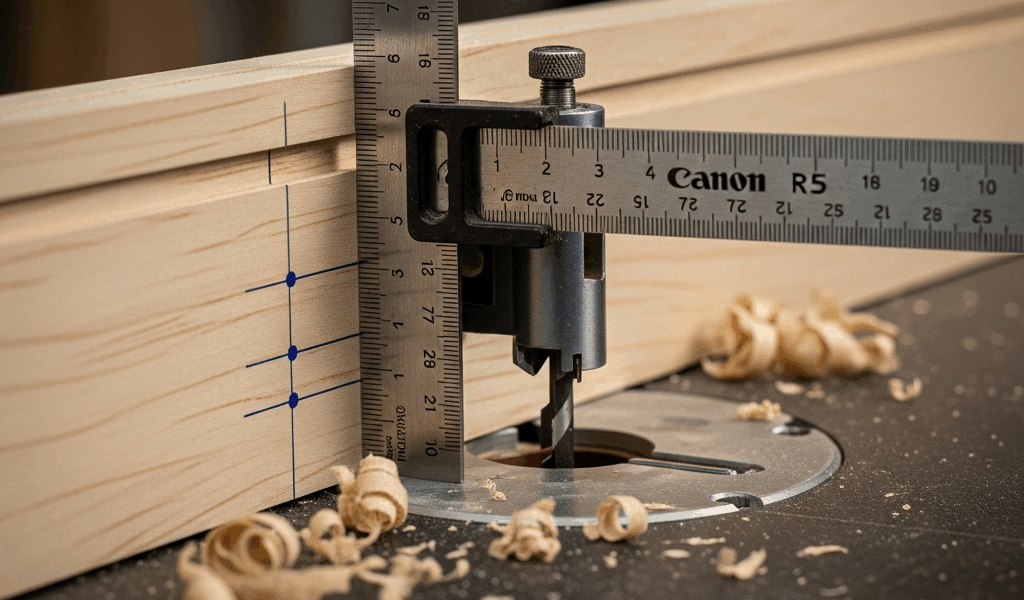
A machinist square works best here — or a combination square with a blade you’ve verified is actually straight. Set it flat on the table surface, blade vertical, and bring it against the fence face. A perpendicular fence sits flush against the full blade height. A leaning fence shows light gaps, either at the top or at the bottom. The gap location tells you which direction it’s leaning.
Most split-fence systems — the Incra, the Jessem, even the standard Rockler two-piece design — allow independent shimming of the outfeed fence face. Loosen the mounting bolts on that half. Slip hardboard shim material or playing cards behind the fence face at the problem corner. Tighten gradually and re-check with the square. Don’t fully tighten and then check — tighten partially, check, tighten more, check again.
If the fence body itself is physically warped or the mounting casting is visibly bent — I’ve seen aluminum fence extrusions take a blow from a dropped router that permanently kinked the face — shimming accomplishes nothing. Replace the fence body. Welding bent aluminum back to true is theoretically possible and practically not worth the time. A replacement Kreg fence runs around $85. A replacement Incra fence face runs about $60. Buy the part.
When the Fence Drifts After You Lock It Down
This one catches people off guard every single time.
You measure the alignment. It’s perfect. You tighten the clamp knob. You measure again — and it’s moved. The act of clamping dragged the fence out of position. Clamp-induced drift is a real thing, and budget fence systems with inadequate clamp geometry do it constantly. It happens because the clamp bolt threads directly through the fence body rather than acting on a separate clamp block, so tightening applies lateral force that pulls the fence sideways as it seats.
I’m apparently sensitive to this problem — and my old Woodtek fence did it to me while the Jessem Mast-R-Fence I switched to never moves under clamping. Don’t make my mistake of shimming and re-shimming a fence for two hours before realizing the clamping geometry itself was the problem.
Test for it deliberately: set your alignment, apply full clamp pressure, re-measure immediately without touching anything else. More than 0.002 inches of shift means clamp geometry is your culprit. Your options are changing the clamping sequence — tighten from center outward rather than end to end — adding a secondary reference block bolted to the table that the fence back registers against during clamping, or replacing the fence with a design that separates clamp block from fence body. The Jessem Mast-R-Fence II runs around $220. The Bench Dog Pro 318 runs about $180. Both solve this problem through better engineering. They cost more upfront and save real frustration later.
Fence alignment is entirely learnable. The diagnostic work takes maybe fifteen minutes with the right tools in hand. Most fixes land under an hour start to finish. Profile work that stays consistent across a full board — that payoff is worth every minute of it.


Stay in the loop
Get the latest crafted wood creations updates delivered to your inbox.