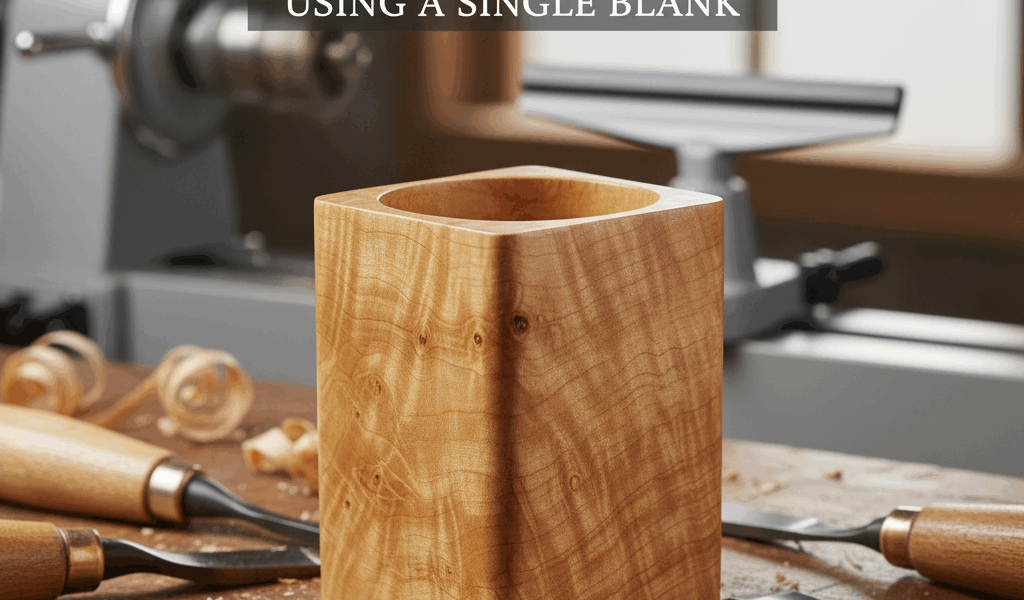
Every lathe owner should have at least one project that starts on the lathe and ends on someone’s desk. The turned pencil cup is that project – simple enough to learn on, quick enough to knock out in an afternoon, and genuinely useful when you’re done. And all it takes is a single blank of almost any wood in your scrap pile.
Starting With the Right Blank
A pencil cup blank should be about 4″ x 4″ square and 5″ to 6″ long. That’s it. You can glue up a blank from scraps if you don’t have a solid piece that size. In fact, laminated blanks with alternating species look fantastic when turned – the layers become concentric rings on the finished piece.
Almost any wood works here. Walnut and cherry look rich. Maple turns beautifully and shows tool marks less than softer woods. Even construction-grade pine makes an attractive cup if you’re learning and don’t want to waste good material. I keep a box of random cutoffs just for lathe experiments.
Mounting and Initial Shaping
There are two schools of thought on mounting. For beginners, a screw chuck is foolproof – drive the screw into what will become the inside bottom of the cup, turn the exterior, then reverse to hollow. For more control, mount between centers first to rough-shape, then transfer to a chuck for hollowing.
Whatever mounting method you use, start by cutting the blank into a cylinder. A roughing gouge makes quick work of this. Take light cuts until the blank is running true, then increase depth. Aim for about 3-1/4″ to 3-1/2″ diameter, leaving some meat for final shaping.
Shaping the Exterior
Now the design decisions begin. A straight-sided cylinder is classic and clean. A gentle curve from a wider base to a narrower top adds elegance. A waist in the middle creates visual interest. Start with your vision and refine as you cut.
Use a spindle gouge for curves and a skew chisel for straight sections (if you’re comfortable with skews – if not, the spindle gouge does everything). Final cuts should be light and clean, leaving a surface that needs minimal sanding.
Don’t forget the bottom. Shape a foot that lifts the cup slightly off the surface – this looks better and hides any mounting marks you might make. A gentle cove just above the foot creates a shadow line that adds definition.
Hollowing: Where the Project Happens
Hollowing is the skill this project teaches. For a pencil cup, you need a bore about 2-1/2″ to 3″ in diameter and 4″ to 4-1/2″ deep. That’s a lot of material to remove from a 3-1/2″ diameter cylinder.
Start by drilling out the center. A large Forstner bit (1″ or larger) chucked in the tailstock removes the core quickly and establishes depth. For deeper cups, make multiple drilling passes or use an auger-style bit.
Widen the bore with a bowl gouge, cutting from center toward the rim. Keep the bevel rubbing and take light cuts. The biggest mistake beginners make is trying to remove too much material at once. Patience here prevents catches.
Wall thickness should end up around 1/4″ – thick enough to feel substantial, thin enough to look refined. Use calipers frequently to check your progress. Consistency matters; a cup that’s thin in one spot and thick in another looks (and feels) wrong.
Sanding on the Lathe
Power sanding dramatically speeds this step. With the lathe running at a moderate speed, work through grits from 120 to 320 or higher. Keep the sandpaper moving to avoid creating rings. Sand both the exterior and the interior – everything is accessible while the piece is still mounted.
For the interior, wrap sandpaper around a dowel or use a small spindle sander attachment. The bottom of the cup and the transition from bottom to wall need attention; these areas often get overlooked.
Parting Off and Final Touches
Part the cup from the remaining stock with a parting tool. Leave just enough material attached that the cup doesn’t fly off, then stop the lathe and cut through the last bit by hand. This prevents damage and keeps the bottom clean.
The parting stub on the bottom needs attention. Sand or carve it flush, then round or chamfer the bottom edge so the cup sits flat without wobbling. Sign your work here if you’re inclined – a small burned signature or carved initials in the bottom adds provenance.
Finishing
A pencil cup sees regular handling, so the finish needs durability. Friction polish (applied while the lathe is running) gives instant results but wears over time. For more lasting protection, apply an oil finish off the lathe, let it cure, then buff to sheen.
If you want the cup to really pop, try a layered approach: thin coats of shellac sealed with wax. This brings out grain figure and provides good protection without a plastic look.
What You’ve Learned
This single project touches every fundamental lathe skill: mounting, roughing, shaping, hollowing, sanding, and finishing. It’s quick enough to repeat with different designs, cheap enough to experiment with, and useful enough that you’ll actually keep the results. Make your first one from scrap. Then make a better one from nice wood. Then make another. That’s how turning skills develop – one cup at a time.

Stay in the loop
Get the latest crafted wood creations updates delivered to your inbox.