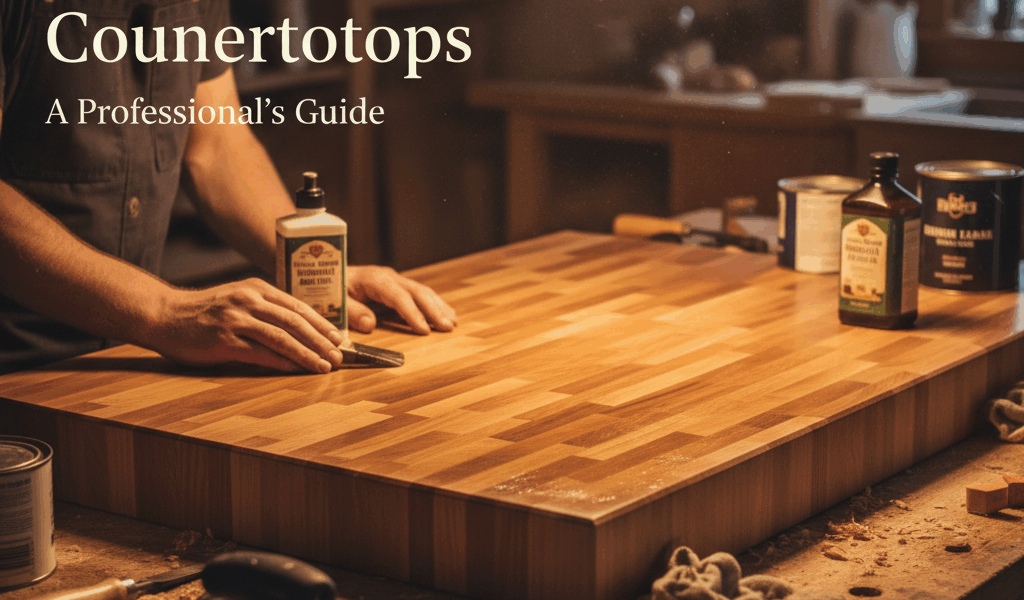
Finishing butcher block countertops has gotten complicated with all the oil comparisons and food-safety debates flying around. As someone who has finished multiple butcher block surfaces — countertops, islands, and cutting boards — I’ve learned what each finish actually provides in daily use. Today, I’ll share everything I know.
How to Finish Butcher Block Countertops
Butcher block looks great and lasts long when finished properly. Get the finish wrong and you’re fighting warping, staining, and a surface that deteriorates in a working kitchen. Here’s the full process.
Preparation
Start with sanding. Use 80-grit to knock down rough spots, then work up to 220-grit for a smooth surface. Always sand in the direction of the grain — cross-grain scratches show through any finish. After sanding, vacuum off the dust, wipe with a damp cloth to pick up remaining particles, and let the wood dry completely before any finish goes on.
Choosing the Finish
The finish depends on how the surface will be used and what maintenance you’re willing to do:
- Mineral Oil: Easy to apply, food-safe, affordable. Requires regular reapplication — more maintenance than other options, but low barrier to entry.
- Tung Oil: Penetrates deeply, water-resistant, food-safe. Better protection than mineral oil with periodic maintenance. My preferred choice for countertops that see daily food prep.
- Polyurethane: Durable and water-resistant. Not food-safe, so only appropriate for display or non-food-contact butcher block. Requires good ventilation during application.
- Waterlox: Tung oil-based, provides a durable waterproof finish. More expensive but long-lasting with less frequent maintenance than straight oils.
Applying the Finish
Mineral Oil
Pour a generous amount onto the countertop and spread evenly with a clean cloth or sponge. Let it soak in for 20-30 minutes, then wipe off excess. Repeat once a day for the first week, then once a month for ongoing maintenance.
Tung Oil
Mix pure tung oil with mineral spirits in a 1:1 ratio for easier application. Apply with a clean cloth in the direction of the grain. Let penetrate about 15 minutes, then wipe off excess. Allow 24 hours of drying time before the next coat. Apply 3-5 coats for solid protection, letting each one dry fully.
Polyurethane
Stir gently to avoid introducing bubbles. Apply a thin, even coat with a quality brush following the grain. First coat: 4-6 hours dry time, or per manufacturer instructions. Lightly sand with 320-grit, wipe off dust, apply 2-3 more coats with sanding between each. Let the final coat cure at least 24 hours before use.
Waterlox
Stir well before use. Apply a thin coat with a lint-free cloth or natural bristle brush following the grain. 24-hour dry time between coats. Light sand with 320-grit between coats, wipe off dust. Apply 3-4 coats for a durable waterproof result.
Maintenance
Clean with mild soap and water. Avoid harsh chemicals that strip the finish. For oil-based finishes, reapply every few months to keep the wood nourished. Polyurethane and Waterlox may only need reapplication once a year, or when the surface shows wear.
Tips and Tricks
- Test the finish on a small inconspicuous section before committing to the full surface.
- Work in a well-ventilated area — especially important with polyurethane.
- Use lint-free cloths to avoid leaving fibers in the finish.
- Sand gently between coats for the smoothest final result.
- Follow the manufacturer’s instructions for your specific product — cure times vary.