I used to be one of those people who dropped keys on the nearest flat surface and then spent ten minutes every morning retracing my steps. The entryway key rack changed that. It’s mounted right by the door, the keys go on the hooks the moment I walk in, and I haven’t searched for keys in two years. Best part? The whole thing costs about twenty bucks in materials and takes less than two hours to build.

Design Philosophy: Simple but Not Boring
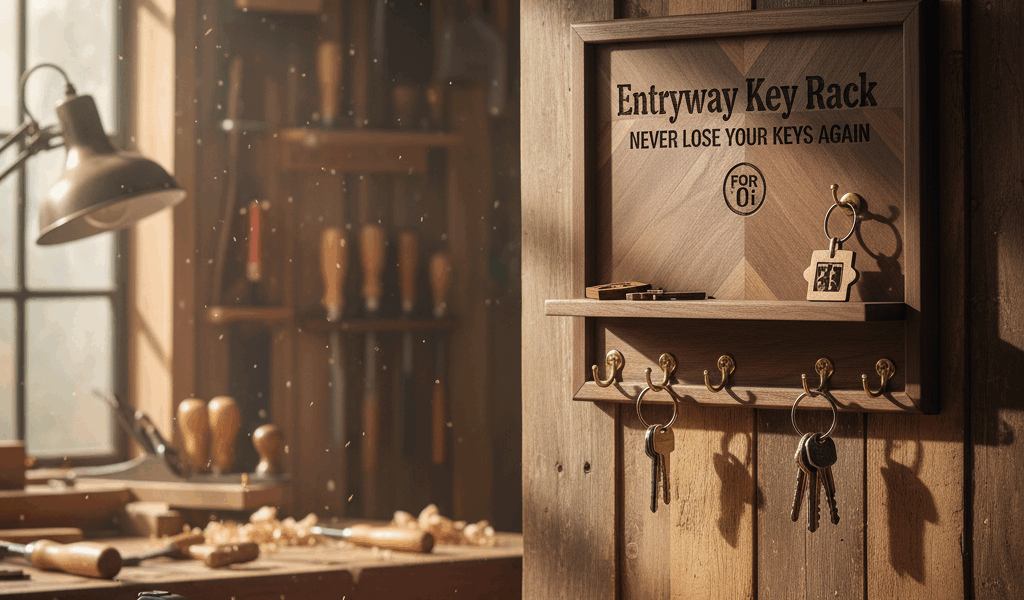
The goal is a piece that blends into your entryway while being functional enough that you actually use it. That means not too big, not too small, and hooks positioned where they’re easy to reach. The sweet spot is a board about 15″ to 18″ wide, 5″ to 6″ tall, with four to six hooks spaced evenly across the bottom.
What elevates this from “board with hooks” to “actual furniture piece” is edge treatment and a simple decorative element. A routed profile on the edges, a beveled top, or a carved house number transforms basic into custom.
Material Selection
Any hardwood works here. For painted versions, poplar is affordable and takes paint beautifully. For natural finishes, walnut and cherry look rich without breaking the bank. If you’re raiding the scrap bin, this is the perfect project – you need so little material that even cutoffs from larger projects work fine.
Thickness should be at least 3/4″ to give the hooks something to grab. I often use 6/4 stock (1″ thick after milling) for a more substantial look and to accommodate deeper hook screws.
The Build: Step by Step
Mill your board to final dimensions. For a standard four-hook rack, 15″ x 5″ x 3/4″ works well. Joint one edge and one face, plane to thickness, then rip to width on the table saw. Crosscut to length.
Edge treatment is next. A simple 45-degree chamfer on all edges takes about five minutes with a router and looks clean. If you want more visual interest, a cove bit or ogee profile adds character. Whatever you choose, consistency matters – route all four edges with the same profile.
Sand through the grits to 220. Ease any sharp corners left by the router.
Hook Selection and Placement
The hooks make or break this project visually. Avoid cheap brass-plated hooks that look like something from a gas station display. Oil-rubbed bronze, matte black, or genuine brass hooks run $2 to $4 each and look dramatically better. Double coat hooks are my preference – they hold more keys per hook and look more proportional on the board.
Space hooks evenly, leaving about 1″ to 1-1/2″ from each end. For a 15″ board with four hooks, that puts hooks at roughly 3″, 6.5″, 10″, and 13.5″ from one end. Mark and drill pilot holes one size smaller than the hook screws, then hand-drive the hooks. Power driving usually strips the holes or cracks the wood.
Mounting Hardware
The rack needs to hang flush against the wall with no visible hardware from the front. Keyhole hangers are the solution. Mortise them into the back of the board so they sit flush, then predrill holes in your wall for the screws they hang on.
For a 15″ rack, two keyhole hangers positioned 10″ apart provide plenty of holding power. Make sure they’re level with each other, or the rack will hang crooked no matter how carefully you install the wall screws.
Personalization Options
This is where a simple project becomes a great gift. Wood-burned house numbers or a family name add instant personalization. A small shelf on top – just a 1″ x 2″ strip attached with dowels or a dado joint – creates space for sunglasses or mail. Mounting a small picture frame above the hooks turns the whole thing into a design statement.
I’ve made versions with a chalkboard strip for quick notes, a small bin for loose change, and even a charging cable channel for phones. Start with the basic rack, and these additions are easy upgrades for future projects.
Finishing
For painted versions, a quality latex paint in a satin or semi-gloss finish is durable and wipeable. For natural wood, two coats of oil-based polyurethane or a penetrating oil finish protect against the inevitable scratches from keys. Let everything cure fully before mounting – at least 48 hours for poly, a week for oil finishes.
Total investment: about $20 in materials (less if you’re using scraps), two hours of work, and a lifetime of actually knowing where your keys are. That’s a return on investment I’ll take any day.


Stay in the loop
Get the latest crafted wood creations updates delivered to your inbox.