Building a mantel clock has gotten complicated with all the mechanism choices and joinery debates flying around. As someone who has built wooden clocks — and spent more than one evening figuring out why the hands kept catching on the face — I’ve learned what actually makes this project go smoothly. Today, I’ll share it all.
Mantel Clock Plans: Building Your Own Timepiece
A mantel clock is one of those projects that rewards patience. It’s a functional piece that also becomes a focal point in a room. With the right plans and careful work, you can build something genuinely worth keeping.

Wood Selection
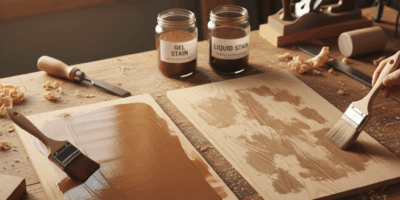
Cherry, walnut, and hard maple are the go-to choices, and all three work well. I’ve used cherry most often — it mills cleanly, holds detail, and darkens beautifully with age into something that looks like it cost twice what the materials did. The critical thing is dry wood. I made the mistake once of using shop lumber that hadn’t fully acclimatized and the case developed a hairline gap at one corner joint about four months later. Buy kiln-dried, bring it into the shop for a week before you cut anything.
For the clock face, you can buy a pre-made face or make your own from metal or acrylic. My first clock used a purchased face and there’s nothing wrong with that — the casework is where your skill shows, not the face.
Hardware to Source Before You Start
Get the clock movement in hand before building the case. Every dimension of the case interior derives from the movement size, and movements vary more than you’d think even in the same product category. The shaft diameter determines your face hole. The movement depth determines how much room you need behind the face. Brass hinges for the glass door, screws, and glass complete the hardware list. I buy slightly better hinges than I think I need — cheap hinges have slop that ruins the door fit on a case this size.
Designing It on Paper First
I spent a Saturday morning on a sketch before touching any wood on my first clock build and it was the right call. Typical proportions for a mantel clock are 10-18 inches tall and 8-16 inches wide, but those are starting points not rules. Classic styling reads as taller and narrower with an arched top. Contemporary reads wider and lower. Work out your proportions on paper and look at them for a day before committing.
Plan the face opening, the pendulum swing path if you’re including one, and any molding details. Keep the design honest to your skill level. A well-executed simple case looks better than a complicated one with uneven reveals.
Triple-check all dimensions before cutting. The measurement errors that hurt most are the ones that only show up at assembly. Sketch the interior space with the movement dimensioned in — make sure there’s clearance on all sides.
Cutting and Assembling the Case
A table saw handles the case panel cuts efficiently if you’re building more than one. For a single clock, a good circular saw with a fence works fine. Sand each component before assembly — getting sandpaper into corners after the case is together is tedious and the results show it.
Assemble the frame with glue and clamps. Go methodically: sides first, then top and bottom. Check square diagonally before the glue sets and adjust if needed. A square case is everything here — even a small amount out of square makes the door gap uneven and looks sloppy.
Installing the Movement
Drill the shaft hole to match your specific movement — measure twice. Mount the movement from behind with screws and thread the shaft through. Then attach the hands: hour, minute, second, in that order, pressing each one firmly onto its post. Check that none of them contact the face and that they clear each other through the full rotation. This is where I’ve lost an hour more than once — hands that look clear at 12 o’clock bind at 3 because one has a slight bend. Check the full sweep before closing up the case.
Install the glass panel on brass hinges. Handle it with gloves. A small chip on a glass edge cuts before you feel it.
Finishing
Final sand after assembly, working through the grits to 220. For cherry and walnut I prefer an oil finish — Waterlox or similar — which pops the grain without building up a thick film. Wipe-on poly works well too and is more durable if the clock will be in a high-traffic location. Two or three thin coats, light sanding between each.
Felt pads on the base protect whatever surface it sits on. Consider carved details or inlays if you want visual complexity, just make sure they don’t extend into the glass door swing path or interfere with the movement access door if you have one.
Keeping It Running
Level matters for pendulum clocks — a clock that runs slightly fast or slow is often just off-level. Dust the case and interior when you dust the room. Check the mechanism annually. Battery movements need fresh batteries every year or two; weak batteries cause erratic timekeeping before they cause complete failure, so don’t wait for it to stop.
Before You Go
A mantel clock build compresses a lot of woodworking skills into one project — precise casework, hardware fitting, glass handling, finish work. The first one takes longer than you expect. The second one goes much faster because most of the surprises already happened. Both are worth building.
Recommended Woodworking Tools
HURRICANE 4-Piece Wood Chisel Set – $13.99
CR-V steel beveled edge blades for precision carving.
GREBSTK 4-Piece Wood Chisel Set – $13.98
Sharp bevel edge bench chisels for woodworking.
As an Amazon Associate, we earn from qualifying purchases.