Making picture frames has gotten complicated with all the molding profiles and miter technique debates flying around. As someone who has built frames for prints, paintings, and custom projects, I’ve learned what actually makes the difference between a frame that looks amateur and one that looks intentional. Today, I’ll share everything I know.
Making Picture Frames
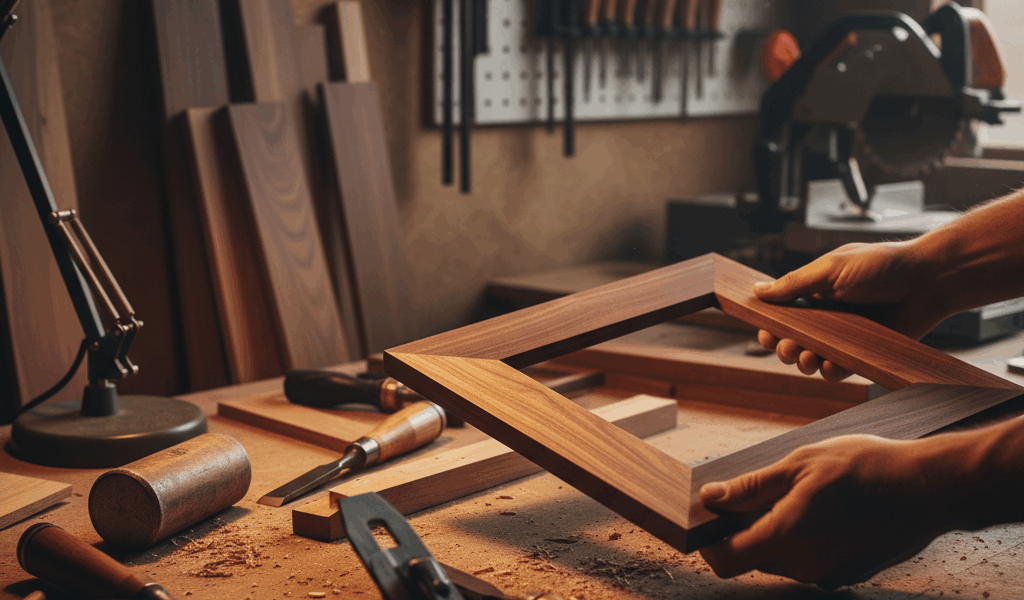
A handmade picture frame elevates whatever you put in it. The process rewards careful measurement more than any other single skill — a frame where the miters close tight looks professional at any skill level, and a frame where they don’t looks like a project regardless of how good the finish is.

Choosing the Material
Pine is the right starting material for anyone new to frame-making. It’s forgiving, takes stain and paint well, and costs enough less than hardwoods that mistakes don’t sting. Once your miters are consistently closing tight and your assembly process is dialed in, move to oak, cherry, or mahogany. The harder species show off fine joinery and a good finish in a way that pine doesn’t — but they’re less forgiving when your miter saw’s fence isn’t perfectly set.
For the frame profile, you can use pre-milled molding purchased from the lumber yard or mill your own on the router table. Pre-milled molding is faster. Milling your own lets you match a specific profile to a specific project. Both approaches work; the choice depends on how much time you want to invest and whether the frame’s profile needs to be custom.
The Measurement That Matters Most
Measure the artwork, not the mat board. The rabbet opening in the finished frame needs to be slightly larger than what it holds — roughly 1/8 inch per side — so the artwork drops in cleanly without binding but doesn’t rattle around. Measure carefully, write down the interior dimensions, and calculate the cut lengths from there. An error at this step means remaking parts after everything else is done.
Miter accuracy is everything. Even a half-degree error at each corner produces a visible gap or overlap at the joint. Set the miter saw carefully, cut a test miter pair in scrap first, hold the two pieces together, and check the joint before cutting your actual material. If the test joint is tight, proceed. If it’s not, adjust and test again.
Assembly
Apply wood glue to both faces of each miter joint — not a thick bead, a thin even coat that covers the surface without squeeze-out all over the frame. Use corner clamps to hold each joint at 90 degrees while the glue sets. Check that the assembly is flat and square before the glue begins to cure — lay it on a flat surface and check the corners with a square. Correct any racking while the glue is still workable.
Once glue is cured, reinforce the corner joints with small brads or staples driven from the back. A pin nailer makes this fast. The glue does the structural work; the fasteners prevent the joint from opening if the glue ever cracks from wood movement. Both together are better than either alone.
Sanding and Finishing
Sand through the grits to flatten any slight mismatches at the miter joints — 80-grit first if any corner is stepped, then 120, then 180. The miter joints often need special attention because the grain directions meet at the corner and sand at different rates. Sand both sides of the miter joint together to keep them level with each other.
Stain highlights grain and adds depth. For painted frames, prime first — primer fills the open grain and gives the topcoat something consistent to bond to. Apply finish in the direction of the grain and allow complete drying between coats. Two thin coats beat one thick one on frame profiles where finish can pool in corners and create runs.
Installing Glass, Mat, and Backing
Cut glass to fit the rabbet opening or buy pre-cut. Safety gloves when handling glass — this is not optional. Clean both sides before installation; dust or fingerprints trapped inside a sealed frame will bother you every time you look at the finished piece. Clean with glass cleaner and a lint-free cloth, then handle by the edges.
Lay the glass into the rabbet, then the mat (if using one), then the artwork face-down, then the backing board. Secure the backing with frame clips or small brads tapped into the rabbet edge at 4 to 6 inch intervals. Check centering and squareness before driving all the clips fully.
Hanging Hardware
D-rings on both sides with wire hung between them is the most secure hanging approach for any frame with real weight. The wire lets you adjust level on the wall by sliding the wire across the hook. For lighter frames, a sawtooth hanger mounted at the center top is faster to install and adequate. Install wall anchors for any frame that’s too heavy to hang from a bare drywall screw.
Mistakes Worth Avoiding
Inaccurate miter cuts are the most common and most visible problem in picture frame work. There’s no finish that hides a gap in a miter joint. Test on scrap, adjust, test again before cutting your real material. Using the wrong glue for the material is the second common mistake — wood glue on wood, not construction adhesive. Rushing through sanding leaves roughness that shows through any finish. Skimping on hanging hardware for a heavy frame is both an aesthetic issue and a safety concern.
Maintaining Frames Over Time
Dust with a soft cloth. Clean glass with gentle glass cleaner — not window cleaner with ammonia, which can damage certain frame finishes over time. Check hanging hardware annually and tighten anything that’s loosened. Keep frames out of prolonged direct sunlight, which fades both the finish and whatever’s inside. For wood frames, occasional furniture wax or polish keeps the surface from drying out and maintains the finish appearance over years.