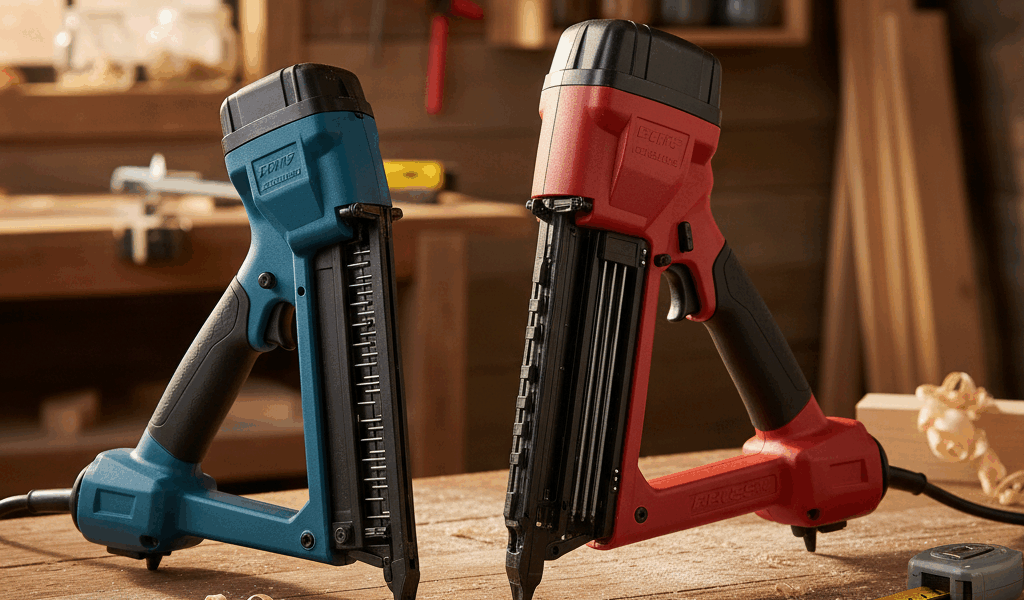
The main difference is fastener size: a brad nailer normally drives thin 18-gauge brads, while a finish nailer drives thicker 15- or 16-gauge finish nails. Choose the brad nailer for delicate trim, small moldings, and parts that glue will ultimately hold. Choose the finish nailer for thicker casing, baseboard, crown, and other trim that needs more withdrawal resistance.
This article includes affiliate links. We may earn a commission at no extra cost to you.
A finish nailer is not automatically the “better” tool. Its larger fastener leaves a larger hole and creates more splitting risk. A brad nailer is not merely a weaker finish nailer; it solves a different problem by fastening small or fragile work with less visible damage.
Brad nailer vs finish nailer: quick comparison
| Feature | 18-gauge brad nailer | 16-gauge finish nailer | 15-gauge finish nailer |
|---|---|---|---|
| Fastener | 18-gauge brad | 16-gauge finish nail | 15-gauge angled finish nail |
| Common tool range | About 5/8 to 2 inches | Often about 1 to 2-1/2 inches | Often about 1-1/4 to 2-1/2 inches |
| Best fit | Small molding, cabinet trim, light assembly, glue-up positioning | General interior trim, casing, baseboard, crown | Heavier trim, thick casing, hardwood applications |
| Hole size | Smallest of the three | Medium | Largest |
| Splitting risk | Lowest, though not zero | Higher | Highest of the three |
| Holding power | Lowest | More than an 18-gauge brad | Generally the most of these choices |
| Magazine | Usually straight | Straight or angled, depending on tool | Usually angled; nail collation must match the tool |
Fastener ranges vary by model. For example, Makita specifies 5/8- to 2-inch 18-gauge brads for its AF506, while DeWalt specifies 1-1/4- to 2-1/2-inch 15-gauge DA-style nails for its DWFP72155. Check the tool label or manual before buying nails.
What nail gauge means
Gauge describes fastener thickness, and the numbering runs backward: a smaller gauge number means a thicker nail. Therefore, 15 gauge is thicker than 16 gauge, and both are thicker than 18 gauge.
- 18 gauge: thin brads with small heads and small entry holes.
- 16 gauge: medium finish nails suited to a broad range of trim work.
- 15 gauge: thicker angled finish nails with more holding power and a larger hole.
- 23 gauge: headless or nearly headless pins for very delicate parts; this is a pin nailer, not a brad nailer.
The gauge alone does not determine whether a fastener will hold. Nail length, shank design, wood species, grain direction, substrate, number and angle of fasteners, adhesive, and movement all matter.
What is a brad nailer used for?
An 18-gauge brad nailer is useful when appearance and splitting risk matter more than maximum holding strength. Typical jobs include:
- Small decorative molding and narrow trim
- Cabinet trim, applied panels, and light face-frame work
- Picture frames and small craft assemblies
- Holding glued parts in alignment while adhesive cures
- Attaching thin backs, stops, or edge details when the material and design permit
- Work near an edge where a thicker finish nail is more likely to split the part
The small hole is easier to disguise in painted work and less conspicuous in clear-finished wood. A brad can still split brittle, narrow, or poorly supported stock, especially close to an end. Test the complete setup on an offcut before fastening the project.
What is a finish nailer used for?
A 15- or 16-gauge finish nailer is the usual choice for larger architectural trim. Common applications include:
- Door and window casing
- Baseboard and chair rail
- Crown molding
- Thicker hardwood trim
- Some stair and cabinet applications when the project plan specifies finish nails
Finish nails resist withdrawal better than 18-gauge brads because they are thicker and are often longer. They also leave a larger hole and can split delicate stock. A finish nail is a trim fastener—not a substitute for framing nails, structural screws, anchors, or code-required connectors. Load-bearing work must follow the applicable plan, fastener schedule, manufacturer instructions, and building code.
15-gauge vs 16-gauge finish nailer
A 16-gauge nailer is the middle option. It generally leaves a smaller hole than a 15-gauge tool while providing more holding power than an 18-gauge brad nailer. That balance makes it a practical general-purpose trim nailer.
A 15-gauge finish nailer drives a thicker fastener and commonly uses an angled magazine. The angle can improve access in corners, but compatibility is specific: nail gauge, collation angle, head style, and strip format must match the tool. “15-gauge” alone is not enough information when buying fasteners.
Choose 15 gauge when the work genuinely benefits from the thicker fastener and can tolerate the larger hole. Choose 16 gauge when a smaller hole and general trim versatility matter more. For fragile molding, move down to 18 gauge rather than forcing a finish nail into stock that is too small.
Brad and finish nail length chart
| Tool class | Common range | Typical decision |
|---|---|---|
| 18-gauge brad nailer | 5/8 to 2 inches on many models | Use the shortest fastener that provides adequate embedment without exiting the back or striking hidden utilities |
| 16-gauge finish nailer | About 1 to 2-1/2 inches on many models | Match trim thickness plus the wall layer and required penetration into suitable backing |
| 15-gauge finish nailer | About 1-1/4 to 2-1/2 inches on many models | Use for compatible heavier trim and substrates when the larger hole and splitting risk are acceptable |
These are common ranges, not universal specifications. Cordless and pneumatic tools can differ, and some models accept only a subset of these lengths.
How to choose the right nail length
- Measure the piece being attached. The nail must pass through it without placing the head too deep.
- Identify the receiving material. Drywall by itself is not reliable backing for trim. Locate framing, solid blocking, or another suitable substrate.
- Allow useful embedment. The fastener needs enough depth in sound material to resist movement, but there is no single length rule that fits every assembly.
- Check what is behind the work. Longer is not automatically safer. Avoid wires, plumbing, glass, finished faces, and thin stock.
- Confirm the tool’s approved range. Use only the gauge, angle, collation, and lengths listed in the manual.
- Test on a mock-up. Use the same trim, substrate, pressure or depth setting, and finish condition.
For a thin applied molding held with glue, a short 18-gauge brad may be enough to maintain alignment. For casing over drywall, a longer finish nail may be needed to reach framing or solid backing. The assembly—not a generic chart—determines the correct answer.
Which nailer should you use for common projects?
| Project | Likely starting choice | Why |
|---|---|---|
| Small decorative trim | 18-gauge brad | Small hole and lower splitting risk |
| Picture-frame reinforcement | 18-gauge brad or 23-gauge pin, depending on stock | Glue forms the joint; the fastener helps alignment or reinforcement |
| Cabinet applied molding | 18-gauge brad | Less surface damage on narrow parts |
| Door/window casing | 15- or 16-gauge finish nail | Thicker and often longer fastener |
| Baseboard | 15- or 16-gauge finish nail | Better holding through trim and wall layer into suitable backing |
| Crown molding | 15- or 16-gauge finish nail | More holding power; backing and nail direction remain important |
| Framing walls | Neither | Use the specified framing fastener or structural connector |
Brad nailer vs framing nailer vs finish nailer
A framing nailer is a separate class. It drives much larger fasteners for framing, sheathing, fencing, decking, or other construction tasks when the fastener schedule permits. Its nails, magazine angle, tool weight, recoil, hole size, and safety considerations are substantially different.
- Brad nailer: delicate trim and light assembly.
- Finish nailer: architectural trim and thicker finish work.
- Framing nailer: construction fastening according to an approved schedule.
Do not use search terms such as “finish nailer vs framing nailer” as permission to substitute one for the other. Follow the project requirements.
How to reduce splitting and visible holes
- Use the smallest gauge and shortest length that still meet the fastening requirement.
- Keep fasteners away from unsupported ends and edges.
- Reduce depth before firing into soft or thin trim, then increase only as needed.
- Orient the tool and fastener correctly for the wood grain and project geometry.
- Use a no-mar tip on finished surfaces.
- Test brittle hardwood, MDF edges, and narrow molding on scrap.
- Fill holes with a product compatible with the final paint, stain, or clear finish.
Some angled finish nails have chisel points intended to reduce splitting, but no fastener makes poor placement safe. A larger nail close to an end can still break the workpiece.
Pneumatic vs cordless nailers
Both power sources can drive brads or finish nails. Pneumatic tools are usually lighter in the hand but require a compressor, hose, fittings, and the pressure range specified by the manufacturer. Cordless tools eliminate the hose but add battery weight and require charged packs.
Power source does not change the basic gauge decision. An 18-gauge cordless brad nailer still drives 18-gauge brads; a 15-gauge pneumatic finish nailer still requires compatible 15-gauge collated nails.
Which nailer should you buy first?
Buy for the work you actually perform:
- Choose an 18-gauge brad nailer first for furniture details, cabinet trim, crafts, picture frames, and delicate molding.
- Choose a 16-gauge finish nailer first for general casing, baseboard, and interior trim.
- Choose a 15-gauge finish nailer when heavier trim and angled access are regular requirements.
One tool cannot cover every application without compromise. If your projects span delicate cabinet trim and full-room casing, owning both an 18-gauge brad nailer and a finish nailer is more reliable than forcing one gauge into every job.
Frequently asked questions
Are brad nails the same as finish nails?
No. Brads are normally thinner 18-gauge fasteners with smaller heads. Finish nails are commonly 15 or 16 gauge and provide more holding power while leaving larger holes.
Can I use finish nails in a brad nailer?
No. Use only the gauge, length, angle, and collation type specified for the tool. An incompatible fastener can jam or damage the nailer and create a safety hazard.
Can an 18-gauge brad nailer install baseboard?
It may hold very light trim in some assemblies, but a 15- or 16-gauge finish nailer is usually the better starting point for baseboard because the fastener is thicker and often longer. Confirm backing, nail length, trim material, and project requirements.
Do finish nails count as structural fasteners?
Not by default. Finish nails are intended for finish carpentry. Do not substitute them for specified framing nails, structural screws, anchors, or connectors.
What gauge brad nailer is most common?
An 18-gauge brad nailer is the common brad-nailer class. A 23-gauge tool is normally called a pin nailer, while 15- and 16-gauge tools are finish nailers.
Related woodworking guides
Manufacturer specifications
- Makita AF506 18-gauge brad nailer specifications
- DeWalt DWFP72155 15-gauge finish nailer specifications
- DeWalt DCN650 15-gauge cordless finish nailer specifications
Reviewed August 3, 2026. Fastener ranges and compatibility vary by tool; verify the model’s manual before loading or firing nails.



Stay in the loop
Get the latest crafted wood creations updates delivered to your inbox.