
Proper clamp pressure ensures strong glue joints without damaging the wood or squeezing out too much glue. Different adhesives require different pressure levels. Too little pressure leaves gaps, while too much pressure starves the joint of adhesive.

Yellow Glue Pressure Requirements
PVA wood glues (yellow glue, white glue) need moderate clamping pressure—approximately 100-150 PSI for hardwoods and 50-75 PSI for softwoods. This pressure closes gaps and ensures good wood-to-glue contact without over-stressing the joint.
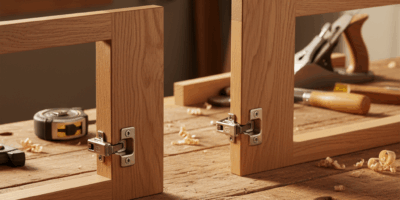
You’ll see a thin, continuous bead of glue squeeze-out along the joint when pressure is correct. The squeeze-out should be minimal—just enough to confirm full contact. Excessive squeeze-out indicates too much pressure, starving the joint of adhesive.
Polyurethane Glue Clamping
Polyurethane glue requires less pressure than PVA—approximately 50-75 PSI for hardwoods. The glue foams as it cures, filling small gaps. Too much pressure prevents foaming and reduces the glue’s gap-filling capability.
Apply just enough clamp pressure to close the joint and maintain contact. You’ll see minimal squeeze-out since polyurethane glue expands rather than flowing out under pressure. Visible foam at the joint line indicates adequate pressure without over-clamping.
Epoxy Pressure Needs
Epoxy requires minimal clamping pressure—just enough to maintain joint contact during cure. Approximately 25-50 PSI suffices for most applications. Epoxy has excellent gap-filling properties and doesn’t require pressure to create strong bonds.
The primary purpose of clamping epoxy joints is preventing movement during cure rather than applying bonding pressure. Light clamps or weights that hold parts in position work adequately. Over-clamping squeezes out too much epoxy, reducing joint strength.
Hide Glue Considerations
Liquid hide glue needs 75-125 PSI—similar to PVA glues. Traditional hot hide glue requires slightly less pressure since it gels quickly. The fast tack of hot hide glue lets you use lighter clamp pressure or even just rubbed joints for some applications.
Hide glue’s open time is shorter than PVA, so you need to work quickly. Apply clamps promptly and check squeeze-out within the first few minutes. The glue begins setting within 10-15 minutes at room temperature.
Estimating Clamp Pressure
Without pressure gauges, estimate adequate pressure by observing joint behavior. The joint should close completely with minimal gap visible. Wood surfaces should touch along the entire glue line.
For PVA glues, tighten clamps until you see squeeze-out, then back off slightly. This “squeeze-out minus a quarter turn” method works reliably for most applications. The joint maintains adequate pressure without being starved of glue.
Soft Wood vs Hard Wood
Softwoods compress more easily than hardwoods under clamp pressure. Use lighter pressure on pine, cedar, and fir to prevent crushing the wood fibers. Crushed areas appear as depressions alongside the glue joint and require sanding to remove.
Hardwoods like oak, maple, and walnut tolerate higher pressures without damage. You can clamp these woods firmly to ensure complete joint closure without worrying about compression damage.
Clamp Spacing Impact
Clamp spacing affects the pressure distribution along the joint. For edge-to-edge glue-ups, space clamps 8-12 inches apart. Closer spacing increases total pressure but may bow the panel. Wider spacing reduces pressure at the center of the span between clamps.
Alternate clamps above and below the panel to balance pressure and prevent bowing. The alternating pattern distributes clamping forces evenly across both faces of the panel.
Caul Usage
Cauls distribute clamp pressure across wider areas than clamp jaws alone. A rigid caul bridging multiple boards applies consistent pressure between clamp locations. This technique works well for gluing up panels from multiple narrow boards.
The caul should be slightly crowned—about 1/16 inch rise over a 24-inch length. Clamp pressure at the center flattens the caul, distributing pressure along its entire length. A flat caul concentrates pressure at the ends.
Temperature Effects
Most wood glues specify 50-90°F working temperature range. Cold temperatures increase glue viscosity and require longer clamp times. You may need slightly more pressure in cold shops to ensure complete joint contact as the thick glue spreads slowly.
Warm temperatures thin the glue and reduce required clamp times. You can use slightly less pressure since the thinner glue flows more easily into surface irregularities.
Clamp Time Guidelines
Clamp time and pressure work together. Adequate pressure shortens required clamp time by ensuring complete glue contact. Insufficient pressure requires extended clamp time to achieve equivalent bond strength.
For PVA glues at correct pressure: 30-45 minutes minimum clamp time at 70°F. The joint can be unclamped and handled carefully at this point. Full strength develops over 24 hours.
For polyurethane glue: 1-2 hours at 70°F. Lower pressure means longer clamp time to ensure the foam cures fully before removing clamps.
For epoxy: 4-8 hours depending on formulation and temperature. The minimal pressure requirement doesn’t reduce clamp time—you’re waiting for chemical cure rather than mechanical bonding.
Visual Pressure Indicators
Watch for these signs of correct pressure:
- Minimal squeeze-out along the entire joint length
- Joint closes completely with no visible gap
- Wood doesn’t compress or dent near clamps
- Panel remains flat without cupping or bowing
Signs of excessive pressure include heavy squeeze-out, compression marks near clamps, and panel bowing between clamp locations.
Recommended Woodworking Tools
HURRICANE 4-Piece Wood Chisel Set – $13.99
CR-V steel beveled edge blades for precision carving.
GREBSTK 4-Piece Wood Chisel Set – $13.98
Sharp bevel edge bench chisels for woodworking.
As an Amazon Associate, we earn from qualifying purchases.


Stay in the loop
Get the latest crafted wood creations updates delivered to your inbox.