A misaligned router table fence produces tapered cuts, tearout, and dangerous kickback. Proper fence setup takes five minutes but ensures clean cuts and safe operation for months of use.

Why Fence Alignment Matters
The router fence must sit perfectly perpendicular to the table surface and parallel to the miter slots. Even 1/16-inch misalignment causes visible defects in edge profiles and joinery.
Outfeed fences on jointing operations require precise alignment to support stock after cutting. Inaccurate setup leads to snipe, chatter, and inconsistent material removal.
Step 1: Square to Table Surface
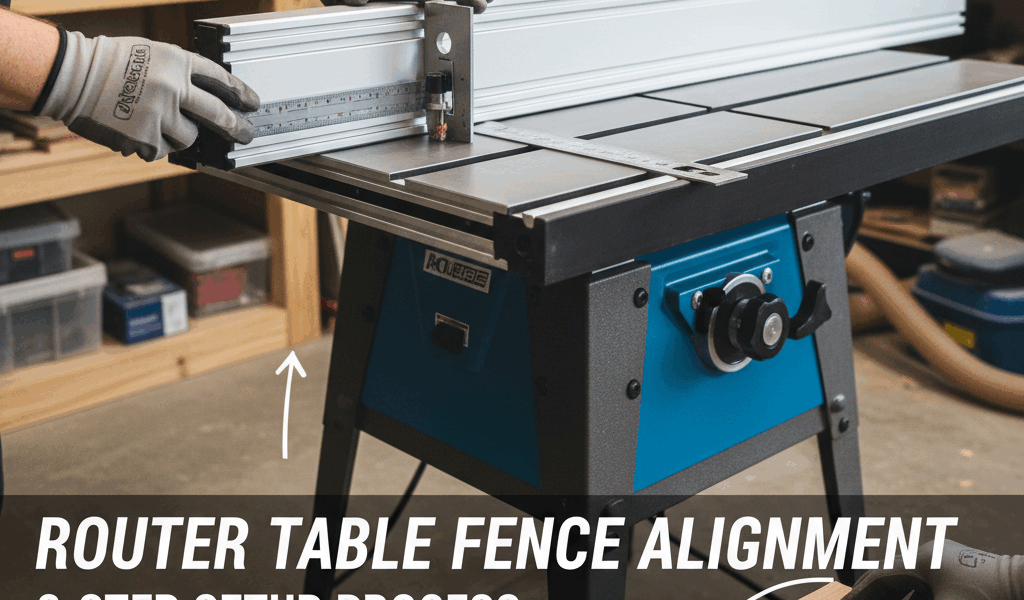
Place a reliable square against the fence face and table surface. Check at both ends and the middle of the fence. The fence should contact the square blade along its entire height.
If gaps appear, loosen fence mounting bolts and adjust. Most router table fences include adjustment mechanisms—set screws, shims, or tilt adjustments. Make small changes and recheck with the square.
Tighten mounting bolts gradually in a cross pattern to prevent the fence from shifting during final tightening. Recheck square after tightening.
Step 2: Parallel to Miter Slots
Miter slots provide reference lines machined parallel to the bit axis. Align the fence parallel to these slots for accurate cuts.
Measure from the fence face to the miter slot at the front of the table. Note this distance. Measure again at the rear of the table. Both measurements should match exactly.
If measurements differ, the fence angles away from parallel. Loosen one end of the fence and tap it forward or back until measurements match. Some fences include micro-adjustment knobs for precise alignment.
Step 3: Verify Bit Clearance
Router table fences typically split into two halves with an opening for the bit. Position these halves equal distances from the bit centerline for balanced support.
The fence opening should provide 1/4-inch clearance beyond the largest bit diameter you’ll use. Closer spacing supports small workpieces better, while larger openings accommodate big panel-raising bits.
Adjustable fence faces let you customize the opening for each bit. Zero-clearance inserts around the bit reduce tearout on delicate cuts.
Fence Face Maintenance
Inspect fence faces for damage, buildup, or wear. Pitch and resin accumulation creates friction and inconsistent cuts. Clean faces with mineral spirits and plastic scrapers.
Dings or dents in fence faces telegraph into workpieces. Sand out minor damage with 220-grit sandpaper backed by a flat block. Deep damage requires replacement faces.
Some woodworkers apply paste wax to fence faces for smoother stock feeding. The wax reduces friction without affecting cut quality. Reapply every few weeks with heavy use.
Split Fence for Jointing
Edge jointing on router tables requires offset between infeed and outfeed fence halves. The outfeed fence advances to support stock after the bit removes material.
Set the offset equal to your desired depth of cut—typically 1/32 to 1/16 inch. Use a straight edge spanning both fence halves to verify the offset remains consistent across the fence height.
Mark your fence with depth-of-cut reference lines for common settings. This speeds setup for repeated operations.
Dust Collection Alignment
Router table fences often integrate dust collection ports. Position these ports directly behind the bit opening for maximum chip capture.
Seal gaps between fence sections and the table surface with adhesive-backed foam weather stripping. Better sealing improves dust collection efficiency.
Check that dust port hoses don’t pull the fence out of alignment. Secure hoses to prevent shifting during operation.
Regular Verification
Recheck fence alignment monthly or after fence adjustments. Vibration and repeated clamping loosens settings over time. A quick square check and miter slot measurement prevents accumulated errors.
Keep adjustment tools near your router table for quick fence tweaks. A combination square, measuring tape, and hex wrenches handle most alignment tasks in minutes.
Accurate fence alignment transforms router table results from acceptable to professional. Invest time in proper setup and maintain alignment through regular checks.
Recommended Woodworking Tools
HURRICANE 4-Piece Wood Chisel Set – $13.99
CR-V steel beveled edge blades for precision carving.
GREBSTK 4-Piece Wood Chisel Set – $13.98
Sharp bevel edge bench chisels for woodworking.
As an Amazon Associate, we earn from qualifying purchases.


Stay in the loop
Get the latest crafted wood creations updates delivered to your inbox.