Jointer Snipe Has Shifted noticeably with all the Conflicting Advice Flying Around
As someone who spent six months cursing my own hand pressure before actually measuring my outfeed table, I picked up the practical knowledge of jointer snipe the hard way. Today, I will share it all with you.
So, without further ado, let’s dive in.
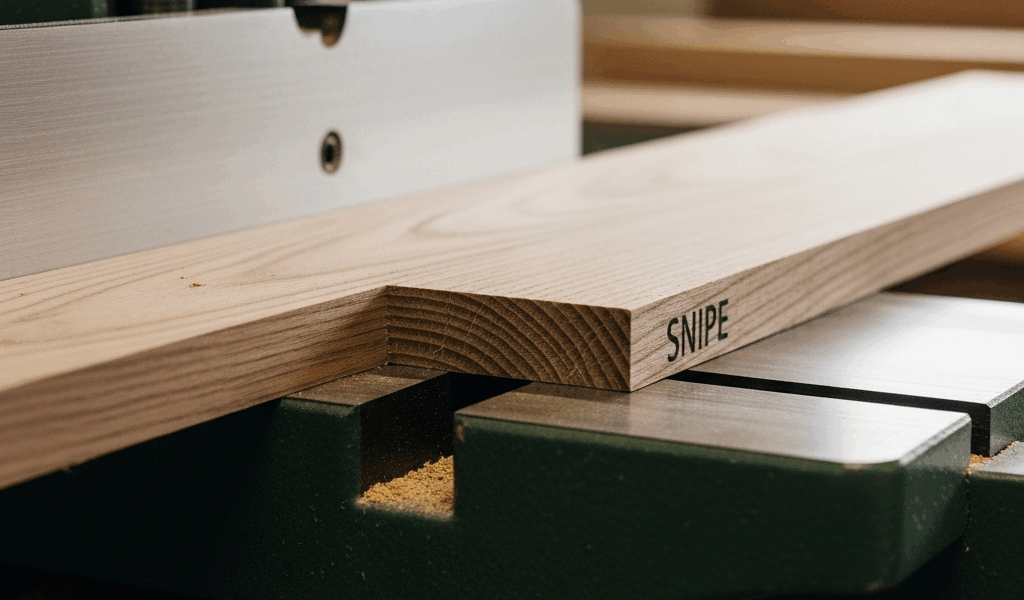
But what is jointer snipe? In essence, it’s that gouged divot at the start or end of your board — the one that makes you feel like an idiot even when your technique is perfectly fine. But it’s much more than that. It’s a mechanical problem. As your board moves from the infeed table to the cutterhead and then onto the outfeed table, one end loses support momentarily. That unsupported edge tips down. Just slightly. Just enough to drop deeper into the knives for a fraction of a second. Then the outfeed table catches it and the board pops back up — but the damage is already sitting there, mocking you.
Most snipe happens at the exit. The trailing end. Entry snipe exists, but it’s rarer — the infeed table is usually doing its job. The real culprit in roughly 80 percent of cases is an outfeed table sitting even a hair below dead level with the knife tips. That’s what makes this problem so maddening to us woodworkers. It looks like operator error. It almost never is.
Check Outfeed Table Height First — Is the thing to know first This, Honestly
Before you change anything about how you feed boards, verify that your outfeed table height is actually correct. This single diagnostic step solves the problem about 70 percent of the time.
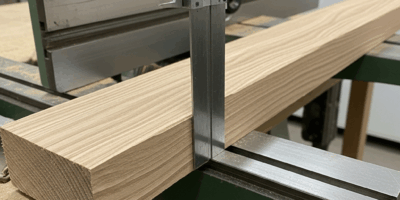
The outfeed table must be perfectly level with the highest point of your cutterhead knives as they rotate. Not close to level. Dead level. Here’s the check: lay a straightedge across your outfeed table, perpendicular to the feed direction. Rotate your cutterhead by hand — slowly. A single knife should just barely kiss the underside of that straightedge as it passes through. You should feel something close to the resistance of sliding a sheet of paper. Obvious gap means the table sits too low. Knife stops hard against the straightedge means too high.
A table sitting 1/32 inch too low will cause exit snipe on nearly every board you run. At 1/16 inch low, it’s guaranteed. I’m apparently sensitive to even small misalignments — my 6-inch Grizzly G0452 benchtop had settled maybe 0.015 inch below where it needed to be, and that was enough to ruin boards for months. Skip the misstep I made.
The fix varies by machine. On the Grizzly, four bolts hold the outfeed table down — one half-turn on the adjustment bolt nearest the tail end lifted everything into position. On Delta and Powermatic floor models, you’re usually hunting for a screw or cam lock under the outfeed side. Check your manual for the exact location. The principle is identical across machines — adjust until that knife just barely touches.
After adjustment, run a test board. A piece of poplar or pine — 1.5 inches wide, 12 inches long — works best because snipe shows up most visibly on narrow stock. Snipe vanishes? You found it. Snipe persists? Keep reading.
Feed Rate and Hand Pressure Timing — The Part That’s Actually on You
Even with perfect outfeed table height, technique can still create snipe. This isn’t about being new to jointers. It’s about understanding the exact moment the board transitions from one table to the other — and what your hands are doing during it.
The critical move happens right after the board clears the infeed table and the cutterhead. Your trailing hand needs to shift from pushing down on the infeed side to pushing down on the outfeed side while the board is still in contact with the knives. Pull your hand away too early — or worse, yank the board forward — and the trailing end drops. Dives into the cutterhead. That last pass leaves the mark you’ve been staring at.
Slow down. Seriously. A board spending four seconds crossing the cutterhead creates far less snipe than one taking two seconds. One foot per second is roughly where you want to be — consistent, moderate, deliberate. Rush it and you’re just fighting physics.
The hand transfer should feel like guiding, not powering. Once the board reaches the midpoint of the cutterhead, all your downward pressure should shift to the outfeed side. Keep it there all the way through the cut. That sustained pressure prevents the tip-down moment that causes exit snipe. That’s what makes this technique endearing to us jointer users — it’s one of those skills that feels awkward for two sessions and then becomes completely automatic.
Benchtop Jointers vs. Floor Models — Different Machines, Different Problems
A 6-inch benchtop jointer and an 8-inch floor model share almost nothing in terms of table rigidity. Benchtop tables flex. Cast iron floor-standing beds do not. That flex amplifies snipe considerably — even with correct outfeed height, a lighter frame can sag under hand-feeding pressure, especially when you’re pushing hardwood through.
While you won’t need a full floor-standing setup to manage snipe on a benchtop, you will need a handful of sacrificial scraps. Feed an 18-inch piece of pine — same width as your jointer fence — through first. It takes the initial snipe hit. Then feed your actual workpiece right behind it. Then add a trailing board immediately behind your workpiece. Another scrap. This extends effective outfeed support long enough that snipe migrates to the end of the trailing board, not your finished piece. Cheap fix. Works every time.
Floor models are more forgiving by design. An 8-inch jointer with a 54-inch bed catches the board’s trailing end far more effectively than a 6-inch benchtop with a 36-inch bed. That said — a floor model with bad outfeed table geometry will snipe just as reliably as any benchtop. The machine size doesn’t fix the geometry problem.
When Snipe Is Your Cutterhead or Knives — The Less Common Diagnosis
Occasionally, neither table height nor technique is the issue. One of your three knives sits 0.005 inch higher than the others. It cuts deeper at exactly the wrong moment — right when the board is mid-transition — and leaves a snipe mark that looks random and baffling.
Check knife projection with a dial indicator if you have one. Set the indicator on the outfeed table, rotate the head slowly, and measure each knife at the same radial position. All three should read identically. One reading high is your culprit. You’ll need to pull the cutterhead and shim or adjust the knife holder until everything lines up.
No dial indicator? Use the straightedge-and-paper method. Lay a straightedge across the outfeed table and slide a sheet of paper underneath from the infeed side. Each knife should pull the paper with equal resistance as you rotate through. One knife grabbing harder than the others — that knife stands proud.
Helical cutterheads — the expensive upgrade, usually $300 to $600 depending on machine size — essentially eliminate this problem. Each cutting edge sits at a slightly different angle rather than all cutting simultaneously. Snipe variance drops to near zero. That’s not a sales pitch. It’s just geometry. But if you’re running a traditional three-knife head and everything else is dialed in, inconsistent knife height is absolutely worth checking before you assume the machine is unfixable.


Stay in the loop
Get the latest crafted wood creations updates delivered to your inbox.