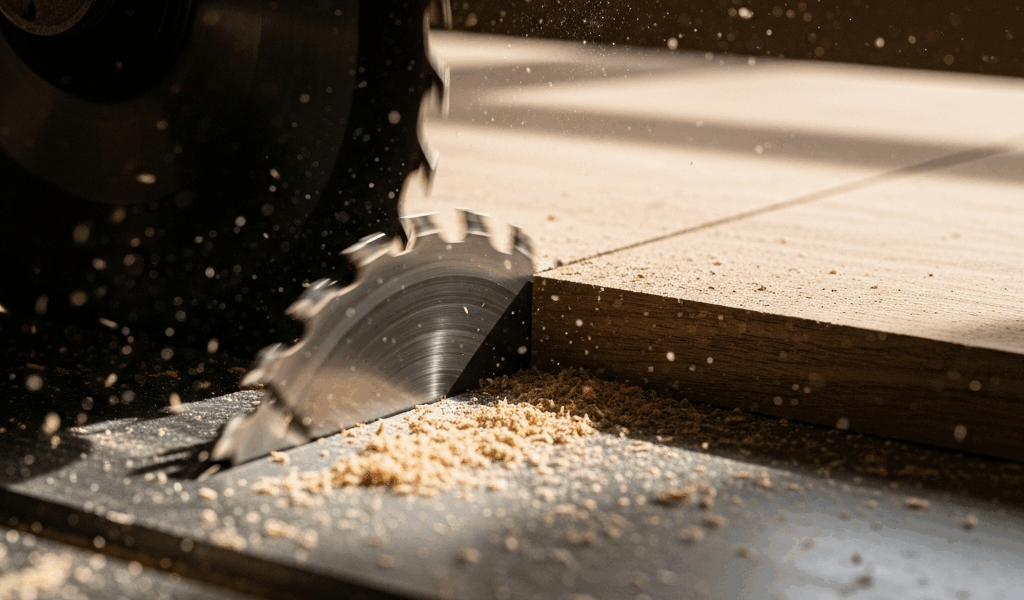
You just ripped a board on your table saw and both sides of the cut came out with dark brown scorch marks. The wood burned instead of cutting clean, and now you’re wondering if the blade is shot or something else is wrong. Table saw burning has seven common causes, and several of them have nothing to do with the blade.
The 7 Causes of Table Saw Burn Marks
Burning happens when friction generates more heat than the cut can dissipate. On a table saw, seven variables control that friction: blade sharpness, fence alignment, feed rate, blade type, depth of cut, wood species, and RPM/blade diameter matching. Most burning is caused by the first three on that list — sharpness, fence, and speed.
Cause 1 — Dull or Dirty Blade
The most common cause and the easiest to diagnose. A dull blade scrapes instead of cutting, generating friction instead of chips. Look at the carbide tips under good light — a sharp tip reflects light at a crisp line. A dull tip shows a visible flat or rounded edge. If the tips are coated in pitch and resin (common after cutting pine or cherry), the buildup prevents the teeth from engaging the wood properly even if the carbide underneath is still sharp.
Clean the blade first. Soak in blade cleaner (Simple Green or CMT Formula 2050), scrub with a brass brush, rinse. If burn marks persist after cleaning, the blade needs sharpening or replacement.
Cause 2 — Rip Fence Misalignment
This is the hidden cause that frustrates the most people because the blade looks fine, the feed rate is reasonable, and the wood still burns. If the rip fence is not perfectly parallel to the blade — even by 1/32 of an inch — the workpiece wedges against the back of the blade as it passes through. The rear teeth contact the already-cut surface and rub against it, generating heat and leaving burn marks on the cut face.
The detection trick: tape a piece of toilet paper to the rip fence near the back of the blade. Run a piece of scrap through the saw. If the toilet paper flutters or tears as the wood passes, the fence is pinching the wood into the back of the blade. Adjust the fence until the wood passes cleanly without contacting the rear teeth.
Most table saw fences can be adjusted with a single hex bolt at the far end of the fence rail. Loosen it, nudge the back of the fence 1/64 inch away from the blade (the back should be parallel to or very slightly open from the blade — never angled toward it), and retighten.
Cause 3 — Feed Rate Too Slow
Pausing mid-cut — even for a second — leaves the spinning blade in contact with the same spot on the wood. That spot burns. The fix is committing to a smooth, continuous feed from start to finish. If you need to adjust hand position or grip, do it before starting the cut or after completing it, not while the blade is in the wood.
The symptom tells you: if burn marks appear at specific points along the cut (usually the middle where you adjusted your grip), feed rate hesitation is the cause. Consistent burn marks along the entire length point to a different cause — blade or fence.
Cause 4 — Wrong Blade for the Job
Using a 60-tooth crosscut blade for ripping is asking for burn marks. High-tooth-count blades produce more friction per inch of cut because each tooth takes a smaller bite and there’s less space between teeth for chip clearance. A 24-tooth rip blade is designed for ripping — large gullets clear waste aggressively and keep friction low. A 40-tooth combination blade handles both reasonably well. Above 60 teeth, ripping becomes a friction exercise.
Cause 5 — Cutting Too Deep in One Pass
Resawing thick stock or cutting deep dados in hardwood generates enormous friction. The blade is buried in wood, chips can’t escape the kerf, and heat builds up. If you’re cutting anything thicker than 2 inches in hardwood, consider making two passes at different heights rather than forcing the blade through the full depth at once.
Cause 6 — Wood Species and Resin Content
Cherry and maple are famous for burning on the table saw. Cherry has high natural resin content that gums up blade teeth. Maple is dense with tight grain that doesn’t clear chips easily. Both species burn at feed rates and blade speeds that work perfectly on oak or poplar.
For burn-prone species: increase feed rate, use a sharp blade (non-negotiable), and consider a blade with a higher tooth count for crosscuts — the finer cut minimizes the need for post-cut sanding.
Cause 7 — RPM vs Blade Diameter Mismatch
Most table saws spin at 3,450 RPM with a 10-inch blade. This is a well-matched combination. But if you’re using an 8-inch blade on a 10-inch saw (which some woodworkers do for dado work or specialty cuts), the tip speed drops and chip clearance changes. Similarly, aftermarket pulleys that change motor RPM can push tip speed outside the optimal range for the blade diameter. If you’ve modified your saw’s RPM or blade size, recalculate tip speed and adjust accordingly.
Quick Fix Chart
Burns along the entire cut length: Dull blade or fence misalignment. Clean/sharpen blade, check fence.
Burns at specific points: Feed rate hesitation. Maintain continuous push through the cut.
Burns only when ripping: Wrong blade (too many teeth) or fence pinching. Switch to rip blade, check fence alignment.
Burns only on cherry/maple, other woods cut fine: Species issue. Increase feed rate, ensure blade is sharp and clean.
Burns with a brand new blade: Fence alignment (most likely) or feed rate. New blade rules out sharpness — focus on the saw setup.

Stay in the loop
Get the latest crafted wood creations updates delivered to your inbox.