A Quick Guide on How to Cut PVC Pipe
Cutting PVC pipe might seem challenging, but it’s a simple procedure once you’ve done it a couple of times. All it requires is a bit of knowledge, the right tools, and enough patience to measure twice.
What PVC Actually Is
PVC stands for polyvinyl chloride — a rigid thermoplastic that shows up everywhere in plumbing, electrical conduit, and more recently in woodworking shops for dust collection systems and jig construction. It’s cheap, strong, and cuts cleanly when you use the right tool. In the shop I’ve used it for everything from a French cleat dust collector arm to a finish spray booth frame I rigged up one Saturday morning.
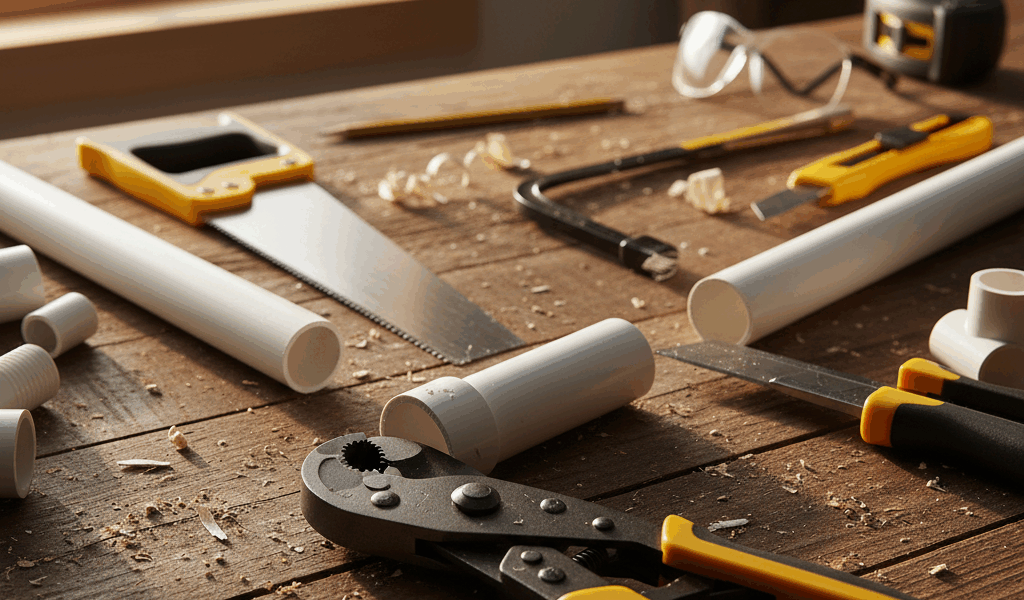
The Tools Worth Having
You don’t need much. A hacksaw handles most jobs. A miter saw is faster and gives a squarer cut, which matters when you’re fitting sections into fittings. A dedicated pipe cutter — the ratcheting kind — is surprisingly good for smaller diameter pipe, quiet, and leaves no sawdust at all.
I tried a cheap no-name pipe cutter from the dollar bin at the hardware store once. Took me four passes and the cut was still crooked. Garbage. Went back and bought a real one. Spent twelve dollars and it’s been on the pegboard for three years since.
You’ll also want a measuring tape, a pencil or marker that won’t smear on slick plastic, and some 120-grit sandpaper for cleaning up the cut edge.
Measuring and Marking
Measure twice. This one really does matter with PVC because a cut that comes out short means you’re back at the store. I wrap a strip of masking tape around the pipe at my mark — it gives me a visible reference line all the way around the circumference, which helps keep the hacksaw tracking square without a vise.
Making the Cut with a Hacksaw or Miter Saw
Clamp or brace the pipe so it doesn’t roll. Apply light, even pressure and let the blade do the work. Forcing it just generates heat and gives you a ragged edge. On the miter saw, a slow feed rate beats a fast aggressive one. The pipe has a tendency to grab and spin if you push too hard.
Using a Pipe Cutter
Set the blade at your mark and tighten the knob until it just bites. Then rotate the cutter around the pipe, tightening a half-turn each pass. Three or four passes on 3/4-inch pipe and it drops clean. No noise, no dust, perfectly square. The only real limitation is diameter — most affordable pipe cutters top out around 1.5 or 2 inches. Bigger dust collection pipe needs a saw.
Cleaning Up the Edges
A freshly cut PVC end has a slight burr on the inside edge. Run 120-grit sandpaper around the interior rim to knock it down. Takes thirty seconds. If you’re gluing fittings, a clean edge makes a better joint and reduces the chance of leaks. If you’re just building a jig, it mostly just saves your knuckles from getting nicked during assembly.
Before You Go
PVC is one of those materials that rewards a minute of prep. Mark carefully, support the pipe while you cut, and clean up the edge. That’s really the whole process. The first time I built a dust collection arm from scratch, I overcomplicated everything — bought three fittings I didn’t need and cut two pieces short. Now I dry-fit the whole run before I cut a single piece. Saves the trip back to the store and keeps my patience intact.