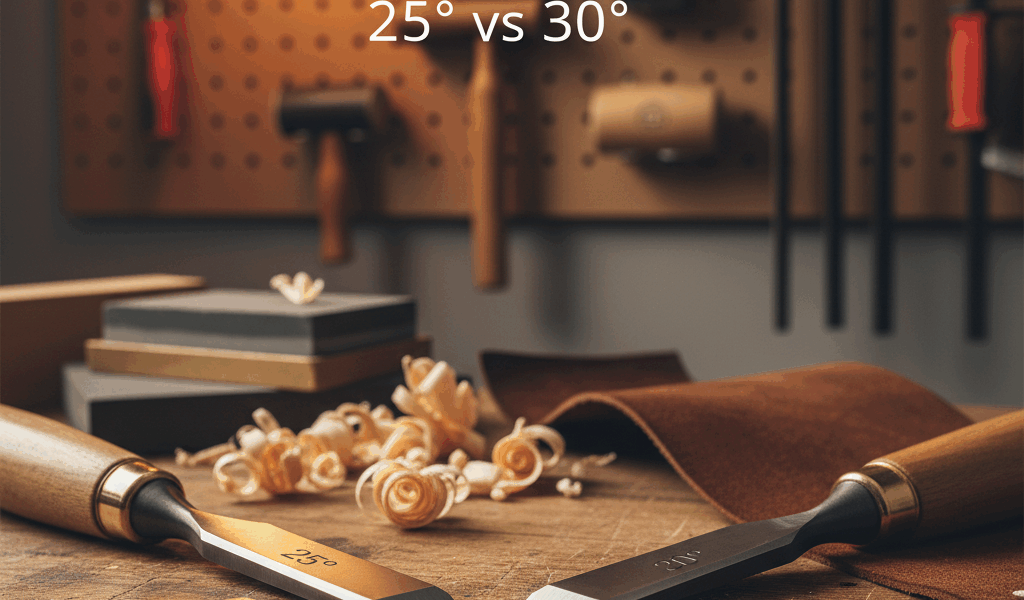
For a general bench chisel, a 25° primary bevel with a small 27°–30° honed micro-bevel is a practical starting point. Use a steeper cutting edge—often 30°–35°—for narrow chisels, hard mallet work, tough wood, or an edge that chips. Use a lower angle only for controlled paring when the chisel’s manufacturer and steel support it.
The key distinction is between the primary bevel, which removes most of the metal, and the honed cutting bevel at the edge. “25° vs 30°” is not always an either/or choice: many chisels are ground at 25° and honed a few degrees steeper.
Chisel Angle Quick Guide
| Use | Practical starting angle | Why |
|---|---|---|
| General bench chisel | 25° primary, about 27°–30° micro-bevel | Efficient sharpening with added support at the edge |
| Fine hand paring | 20°–25°, if the tool maker permits | Lower wedge angle can reduce cutting resistance |
| Light mortising / mixed work | 25°–30° | Balances paring and moderate impact |
| Dedicated mortise chisel | 30°–35° or maker specification | More metal supports mallet-driven work |
| Heavy mortising or brittle edge | 35° or higher when recommended | Additional support can reduce chipping |
| Narrow bench chisel | Often 30° primary | Narrow edges receive less support across their width |
These are starting ranges, not universal commands. Follow the chisel manufacturer first. Veritas, for example, supplies its 3/8-inch and smaller bench chisels with 30° primary bevels and larger chisels at 25°, then recommends a small micro-bevel.
25° vs 30°: What Actually Changes?
A lower bevel angle creates a narrower wedge behind the cutting edge. In suitable steel and controlled use, it can enter wood with less resistance. But it also leaves less material supporting the edge.
A higher bevel angle creates a broader wedge. It generally requires more force but better supports an edge subjected to impact, knots, hard end grain, or levering. Edge durability also depends on steel, heat treatment, blade thickness, sharpening quality, and the actual task.
Do not assume every edge failure means the angle is too low. Chipping can also result from overheating during grinding, a remaining factory wire edge, coarse scratches, lateral prying, hidden fasteners, or a defective blade.
Primary Bevel vs Micro-Bevel
The primary bevel is the large ground face. A micro-bevel is a narrow strip honed at a slightly steeper angle directly at the edge. This approach reduces sharpening time because routine honing removes metal only from a small area.
A common sequence is:
- Grind or establish the primary bevel at 25°.
- Hone a very narrow secondary bevel around 27°–30°.
- Remove the burr from the flat back without creating an uncontrolled back bevel.
- Repeat the same micro-bevel during touch-ups.
- Regrind the primary bevel when the micro-bevel becomes too wide to hone efficiently.
Veritas specifically describes honing a 2° micro-bevel on its bench chisels. Other manufacturers may recommend a different method, including a single bevel. Preserve any intentional specialty geometry.
Choose the Angle by Chisel Type
Bench chisels
Bench chisels perform paring, fitting, light chopping, and general cleanup. A 25° primary bevel plus a slightly steeper honed edge is the most versatile starting configuration. If the edge repeatedly chips during legitimate use, raise the honed angle in small increments.
Paring chisels
Long paring chisels are pushed by hand and should not be struck unless the maker says otherwise. Their lower-angle edges prioritize low cutting resistance. The Veritas honing-guide chart places paring chisels roughly in the 15°–25° range depending on wood and tool, but the individual maker’s specification controls.
Mortise chisels
Mortise chisels have thick sections intended for mallet work. They commonly use 30°–35° or steeper edges. Do not convert one to a delicate 20° paring edge simply because it feels sharp on a test cut.
Japanese and specialty chisels
Laminated, hollow-backed, skew, fishtail, carving, and sash-mortise chisels can require specific geometry. Consult the maker before flattening, changing bevels, or adding a back bevel.
Wood Species Is Only Part of the Decision
The old rule “25° for softwood, 30° for hardwood” is too simple. Softwood can contain hard knots, and hard maple can be pared cleanly with a properly supported low-angle edge. End grain, silica, glue lines, dirt, impact, and grain reversal can matter more than the broad hardwood/softwood label.
Start with the manufacturer’s geometry, then watch the edge:
- If it stays sharp and cuts comfortably, keep the angle.
- If it chips during appropriate use, increase the micro-bevel a few degrees.
- If it rolls, confirm steel condition and raise the angle.
- If it remains intact but requires excessive force, confirm sharpness, flattening, and bevel quality before lowering the angle.
How to Measure and Set the Angle
A honing guide produces repeatable geometry by controlling blade projection. Use the guide’s own projection table or angle jig; projection measurements are not interchangeable between guide designs.
- Clean the chisel and guide clamping surfaces.
- Seat the blade squarely and set the required projection.
- Confirm the bevel contacts the abrasive evenly.
- Use light, controlled strokes and keep the roller clean.
- Mark the bevel with permanent marker if needed to see where the abrasive is cutting.
Freehand sharpening can work equally well, but consistency matters more than hitting a number to a fraction of a degree. A small angle-setting block helps repeat a successful setup.
Sharpening Sequence
1. Prepare the back
The first section of the back near the cutting edge must provide a reliable reference. Follow the manufacturer’s preparation instructions; do not unnecessarily polish the entire blade length.
2. Repair or establish the primary bevel
Use a coarse abrasive only when the edge is damaged or the geometry must change. Keep the edge cool. High-speed grinding without adequate control can overheat thin steel at the tip.
3. Hone through appropriate grits
Move to the next abrasive when the previous scratches reach the edge and a continuous burr forms. Excessive grit progression wastes time; too large a jump can leave deep scratches.
4. Form the cutting bevel
Raise the guide to the chosen micro-bevel setting and make a narrow, continuous polished strip. Wider is not better.
5. Remove the burr
Use the fine abrasive on the back, keeping it registered flat. Alternate carefully until the burr is gone. Test on wood rather than shaving skin.
Safety While Sharpening and Using Chisels
- Work with the cutting edge directed away from hands and body.
- Secure the workpiece before paring or chopping.
- Use a suitable mallet only on a chisel designed to be struck.
- Never use the chisel as a pry bar.
- Control grinding dust and follow abrasive-machine eye, respiratory, and guarding requirements.
- Store sharpened chisels with edge guards or in a rack that protects the cutting edge.
Troubleshooting
The edge chips immediately
Raise the micro-bevel, confirm the chisel is appropriate for the task, and inspect for overheating or a damaged factory edge. Remove enough steel to get behind compromised metal.
The chisel feels sharp but will not pare cleanly
Check whether the back is flat at the edge, the burr is fully removed, and the bevel reaches a continuous apex. Also inspect grain direction and work support.
Honing takes too long
The micro-bevel may have become too wide, the abrasive may be glazed or dished, or the chosen grit may be too fine for the required metal removal. Re-establish the primary bevel when needed.
Frequently Asked Questions
Should a chisel be sharpened at 25° or 30°?
For a general bench chisel, start with the manufacturer’s angle. A common setup is a 25° primary bevel with a small 27°–30° honed edge. Narrow or mallet-driven chisels often need 30°–35°.
Is a 30° chisel less sharp?
Both angles can be honed to a sharp apex. The 30° edge has a steeper wedge and may require more force, but “sharpness” also depends on apex quality and burr removal.
How large should a micro-bevel be?
Only wide enough to create a continuous finished edge—typically a narrow strip. Regrind when it becomes inefficient to hone.
What angle is best for a mortise chisel?
Follow its manufacturer. Many dedicated mortise chisels fall around 30°–35° or higher for heavy use.
Manufacturer References
- Veritas: preparing and sharpening bench chisels
- Veritas Mk.II honing-guide angle chart
- Veritas sharpening system and micro-bevel settings
Use the geometry specified by the manufacturer of your exact chisel. The ranges above are diagnostic starting points, not substitutes for its instructions.



Stay in the loop
Get the latest crafted wood creations updates delivered to your inbox.